Another day, another fun tutorial.
In Jessica Sprague's class she taught us how to use clipping masks and textures. Since not everyone has access to her class and the free downloads, I thought I'd teach you how to make your own. It's super fun and easy and it is totally your own.
First open a new document, but when you do, make sure that the background is transparent. I saved mine that way, but I'm not sure it will show up here that way. It should look like a gray and white checkerboard.

Now you have the new document with a transparent background. Now, create a new layer, and click on the Rectangular Marquee tool. It should be at the top of your tool bar and it looks like a square in dotted lines. You can change this to a circle by right clicking on it, but for this, I want a rectangle. Draw a rectangle by clicking on the top left corner of your document and dragging it to the right bottom corner to nearly fill the space. You will have the marching ants rectangle. Now find the paint bucket tool. It looks like a paint bucket pouring out. Click on that, then click somewhere inside your rectangle. This will fill the space with whatever your foreground color is. Mine is black. It doesn't matter what the color is, but black makes it easier to see. It looks like this:
Hit Control + D to deselect and get rid of the marching ants.
Now for the fun part. Below your layer's pallet is a square with a circle in it. If you hover over it, it will say Vector Mask. This is what you want. Click on that and another rectangle will appear next to the first rectangle in your layer's pallet. Now make sure the color swatch has black on top. Black erases, White restores. Select your brush tool. Choose a brush that looks like a paintbrush has just dabbed one spot. You should have several in your default brushes. I used 3 different ones and got different effects each time. I set he size to be around 100 pixels to get it big enough for me. Now paint around the edges of your black rectangle. It will erase part of it. If it is too much, either hit Control + Z, or change the foreground color in the color swatch to white and paint again. It will bring back what you erased. I also played with the flow and the opacity sliders that are at the top of the tool bar. Keep playing until you get a look that you like. I made 2. Here they are:
Play with your brushes to get a look that you like. I think I will go with the second one.
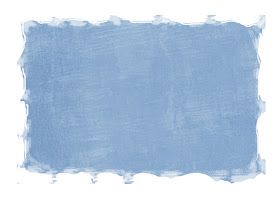
Now open a paper or a photo you want to clip to this mask. I opened a blue paper I had to see what the mask would look like. When you open it, use the move tool to drag it on to your mask. It should be on top of the mask so you can't see it. Now move your cursor to the line between the blue paper layer and the photo mask layer and hit Alt + Click. When you hit alt, a double circle will appear. This shows you that a clipping mask will happen. When you alt + click, it should look like this:
Now let's see what the same mask looks like with a photo. To change it, drag the blue paper layer into the trash can icon below the layers pallet. Then open a photo and drag it on to the mask. Again hit Alt + click as you hover your mouse on the line between the photo layer and the mask layer to create the clipping mask. Mine looks like this:
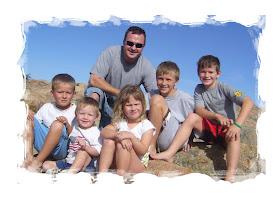
I really like it and would totally use this on a layout, but let's kick it up a notch, well, just because we can. I opened a brown paper because the blue with my photo didn't work. Next, drag the brown paper over to the photo mask document. It's OK if it's on top. We will move it in a minute. Now I like this paper, but lets add a pattern texture to it. With your mouse over the brown paper, right click to open a dialog box. One of the options should say pattern. Click on that and it will open another box with some default patterns in it. Or you may have some from www.brusheezy.com. They have some super cute ones for free. I chose one I got from another class I took. When you have selected the one you want hit OK. It will automatically take you back to your origional document. Don't Freak! I know you can't see anything but the black and white pattern. Go to the opacity slider above the layers pallet. I moved mine down to about 25%. Move it around to get the look you like. Now hover your mouse over the line between the pattern and the paper layer and hit Alt + click That will clip the pattern to only the paper. It will look like this:
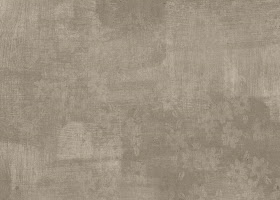
I really like this. The paper layer should be highlighted. Hit the shift key while you click on the pattern layer too. This will select both layers. Now click and drag both layers below the photo mask layer to move the paper to the background. It should look like this:
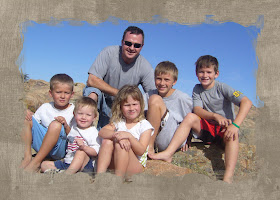
Let's see what the photo will look like with a pattern layer applied to it too. You can do the preceeding steps again to create the pattern layer, or click on the pattern layer you already have, then hit Control + J to create a duplicate layer the pattern layer. Drag that layer above the photo layer and reduce the opacity. Hover on the line between them and hit Alt + click again to clip it to the photo. Now you are done. Here's what mine looks like:
Cool huh! I love playing with brushes and texture! Have fun creating! Plus when you are done creating your own grungy photo masks, save it as a .psd file, name it photo mask, and you can use it over and over again. The best part is that it was FREE! Gotta love it!
Friday, July 10, 2009
Wednesday, July 8, 2009
Day 2 and 3 together
It's now day 3 of Jessica Sprague's class and I thought I'd try batching them together. Brushes, and creating a vintage photo. Since I did mine a little different than she did here goes.
Here is the origional photo of my son:
Now lets do some changing.
First I clicked on the yin-yang circle at the bottom of the layers pallet, then on Hue/Saturation. This created a new layer that we can play with and not change the actual photo. My Hue/Saturation is set to 0 for Hue, -50 for Saturation, and 0 for Light. This is the beginning of the changes. It looked like this:
Next I hit the yin-yang symbol again and created a new hue/saturation layer. This one I set to -25 for Hue, -35 for Saturation, and 0 for Light. I didn't love that, so I opened the Blending mode drop down menu above the layers pallet and set it to Soft Light. It looked like this:
Next she added some cute rosy cheeks to her photo. Since when I followed her instructions, it didn't look as good, I tried something different. Create a new layer and select the Brush tool. It should be a soft round brush. I set mine to about 100 pixels. Next click on the color swatch to select a cute pink color. Now click and paint on one of the cheeks in your photo. It will be very strong, but that's OK because we will change that. It looked like this:
I only did the left cheek, just in case I need to adjust them separately. The Blending mode is set to Overlay. The right cheek looked like this:
Now we are done makeing our vintage photo. Now I added a couple of brushes to the photo. The first is a border brush from Jessica's kit. It looks like this. I chose black for the color.
Next I added a word art brush from Jessica's kit. I chose gray for the color.
Since I don't love this, it's too washed out, I'm going to change it a little. Next Stamp the same brush on another layer in white above the gray one. Now click on the gray brush layer, then hit Control + T to change the size of the brush. I moved it around a little to get an off set gray brush behind the white one. It gave it a grungy look that I liked. Here's the finished photo:
It's fun to play with the settings and all the possiblities Photoshop has. I'm not an expert at photography, but with photoshop, I can enhance my pictures to look like they were professionally taken and re-touched. Plus with scrapbooking, it's like drinking from the firehose. There is so much out there, and everyone is at a different level. But that's OK. That's what life is all about. Learning, and learning again.
Monday, July 6, 2009
Jessica Spragues Frame up class
Today was day 1 of Jessica Spragues Frame-up class. I already knew how to do what she showed us in the tutorials, but if you don't know how to resize an image, and add a transparency overlay to your photo, I highly recommend signing up, (that is if you didn't already, you really missed out because it was free.) and following her tutorials. She is very good! Anyway, I thought I'd try some playing on my own. Here's the origional photo.
It's cute, but not that great. First I created a new document by hitting Control + N. This opens a dialog box to choose the size. I chose 5x7 for my finished size. Next, hit the V key to activate your Move tool. Drag a copy of your origional photo on to the new document mat. You may need to resize this a little. I did. I used the Control + T keys to activate the Transform tool. Click on a corner to change the size. If you want to rotate it a little move your cursor outside the dotted line and move it around until you get a curvy arrow. This will allow you to rotate your picture.
Next I adjusted the levels on my photo because I wanted the colors to pop. To do that, at the top toolbar, click on Image>Ajustments>Levels. This gives you a histogram. Click on the right and left arrows and drag them in a little. This intensifys your colors.
I still wasn't happy with the result so I hit Control + J to make another copy of the origional photo. Then above the layers pallet there is the blending mode dropdown list, it is next to the opacity slider. Normally it is set to normal, pretty ingenious right, but I changed mine to Overlay. That was really strong, so I decreased the opacity to about 55%. Here's what that looks like:
I like the coloring in that much better. Next in Jessica's tutorial, she added a frame overlay. Since I didn't love hers, I went to www.brusheezy.com to find some free ones. I used a lace one and a flower flourish one. Choose what works for you.
Since some of you have never uploaded your brushes yet, or don't know how to, here's how. First open your photoshop program. Next, under the Edit key in the toolbar, there is a Preset Manager in the drop down list. Click on this. It it should open a new dialog box. Make sure it is set for brushes at the drop down menu. Then click on the Load box. This will open a new box with your files. Find your file you saved the brushes into. You also need to make sure they are unziped. To do that click on the zipped file and an extract program should open up. I use extract now that I downloaded for free on the internet. Click and drag the zipped files into the extracting program and click extract. Once the files are unzipped, click on one to open it. There should be a brush icon, if there is not, it will tell you no files available. Click once on it and your brushes are loaded.
Ok back to the photo. I opened a new layer in the layers pallet. Click on the brush tool, then from the drop down menu on the top, select the brush you want. Make sure the color is what you want by checking the color chips on the toolbar. Now stamp your brush where you want it. I put mine along the lower right corner. Be sure you make a new layer for each stamp of the brush, that way if you don't like it or you want to move it or change the size you can. Otherwise they are linked together.
I played with several until I got the look I liked. There are 3 different brushes on this photo. You can also play with the opacity for each one by adjusting the opacity slider. It looked like this:
Next I added some text. Create a new layer. Click on the text tool
which is the capitol T on the tool palette. Play with your fonts. I chose a grungy swirly one. It is called VNI-HLThuphap. I probably got it from Dafont.com. Most of my fonts came from there because it's Free! Now I'm done. Here's what the finished photo looked like:
Have fun playing with your brushes in Photoshop. It definitely adds that little something to your photos!
Happy Summer!