Yup! You can make your own custom paper to match your photos, or to match that cute digi paper you downloaded but the kit didn't come with every thing you wanted.
So here goes. There is a little difference between Photoshop CS2 and Photoshop Elements, but since most of you are using PSE, then I'll give the instructions for that program. I made a card as a sample to show you what you can create.
Open a new file in Photoshop by hitting Control + N. Make it the size you want. Usually 12x12. Mine is 5x7. The size doesn't matter. Maybe you want to make an extra kind of patterned paper for your photo mat or whatever. Make it the size you want. Next in PSE hit K to change the tool to the paint bucket tool. On the side is the color paint chip thingy. The one on top will be the color you fill the area with. Usually it is black and white. You can change it by clicking on the top chip. A color box will appear and you choose the color you want and hit OK. Then click somewhere in the middle of your document. It will fill the space with color. I chose blue. Here's mine.

Ok. Now comes the cool part. Did you go to www.brusheezy.com? They have some very cute patterns you can download for free. Once you have chosen some, you need to unzip the files. Now you are ready to go get one for your patterned paper. Hit control + O to open the file. Find your brusheezy file you want. Select it and hit OK. Next drag it on to your main document. I chose a flower swirly one. It looks like this:
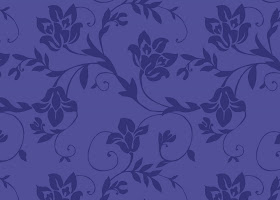
The pattern is a little strong for me so I reduced the opacity to about 50%. Play with the slider above the layer's pallet to get the look you want. Another way to change the opacity is to set the blending mode to soft light. It's play time to figure out the look you like. Here's mine.
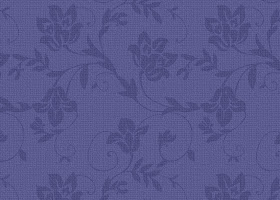
I like this but we aren't done. Now the Bazzill texture. Create a new adjustment layer>pattern>select dark coarse weave pattern from the Artist Surfaces Library>OK Now it's so dark that it covers everything. You need to reduce the opacity to about 40% and set the blending mode to Soft Light. After that I added text to my card. The font is Texas Hero
that I got free from www.dafont.com. I resized it using Control + T and reduced the opacity to about 75%. Then I added a drop shadow. It looks like this:

We are almost done. For all you scrappers, how many of you ink the edges of everything? I'm sure all of your hands are up, and if they aren't, you aren't being honest with yourself, or all I can say is 'Why not?' But since we are digi now, we can still get the inked edge look. Of course you can but inked edge kits from Scrap Girls, or Designer Digitals that are grungy and cool, but if you don't want to do that, just add a little dimention and color to the edges of your paper you can use the burn tool. It looks like a little hand that would be holding a pencil if there were a pencil in the hand. It might be hidden behind the dodge tool that looks like a lollipop. If you click on the tool, then right click on it, a dropdown menu will appear with all the tools that are "under" that one. Choose the Burn tool. Next you may want to change the brush size. You decide how big you want it to be. Mine is fairly small, less than 100 pixels. Make sure you are on the background layer. Click on a corner of your document. Now hold down the shift key while you click and drag your cursor down or across your document. This will keep a straight line. Release the mouse and start from the next corner holding the shift key down while you click and drag the next side. I think I reduced the opacity a little, but play with it and try to get the inked look you want. If you mess up, my favorite thing is Control+Z. It will undo the last step you just did. If you need to undo more than one step, go to Edit>Step Backward. These two are your digi scrappin' BFF! Here's what my finished card looked like:

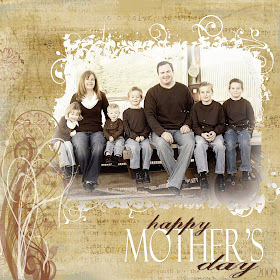
Now I can upload it to some online printing company like www.shutterfly.com and they will print my custom cards for cheap. Or I can save this and use it on a layout. I hope you had fun making your own custom paper. My favorite is making the texture like Bazzill paper. Next week we will play with layer masks. Here's a layout I made for my mom for mother's day using a clipping mask and a brush. Super easy!
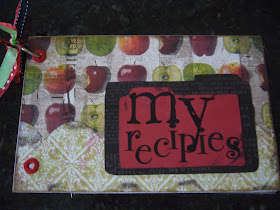
Oh yeah. I did finish my recipe card holder last week. I just never got a picture to post. So here it is. I am missing the bottom ring for it, but I got some today so it will be finished all the way today. The stamps came from my favorite stamp company Technique Tuesday.


 Thanks for looking. Oh, and tell me if the tutorial was OK, too wordy, not wordy enough, easy to follow, etc. Bye!

Ok-I feel dumb-but I went to the jessica sprague site and found a cute freebie and tried to download it and got stuck when it wouldn't save to my computer. It went to the temporary internet files and then I couldn't find it....I think I need a tutorial from the very beginning.
ReplyDeleteI love that you are doing tutorials! I took photoshop years ago, and can't remember a lot of what I learned. I'm excited to learn how to use my PSE better. Thank you! (Debbie's friend Amy)
ReplyDelete