Friday, August 23, 2013

Wall Art Week - Part 3


Day 3 is upon us already.

This will be a short and sweet post of another piece of wall art.
Just like the birds from yesterday, I screwed pallet wood slats together 
and added this fabulous key image I got from The Graphics Fairy.


I put the image on the wood using an opaque projector and a sharpie.
Then a light walnut stain, and a wax top coat to finish.
A little hardware in back and Done!


I will definitely be pondering other ways to use this great key image.
The Graphics Fairy has several skeleton key images on her site.
Have a look around.  I promise you won't be disappointed.

I've had several coments asking me about my blog background.
I do make it myself.
I'm creative and cheap that way.
Next week I will show you step by step how I did it.

Cheers!


Thursday, August 22, 2013

Wall Art Week - Part 2


Today is part 2 of Wall Art week.

I can't tell you how much the little hampsters are toiling away 
in my head right now with ideas for more wall art projects.  
Most of them go into my inspiration book to save for later.
If I don't write or draw them when the idea comes, it's usually gone forever.
Some are persistent enough to come back to me, and usually those get made right away.

But this bird image from Graphics Fairy still hangs around in the back of my mind.
I love the image and there are so many ways to use it.
You betcha I'm going to be doing some Christmas Trees with this.

But for today I just played with some pallet boards and one line of birds.
The pallet wood already had some color to the slats which I'm totally fine with.  They are all approximately the same length, I just staggered them when I screwed each slat to a wood picket.


Then I followed the same method as this project with my image and projector.
Next a little walnut stain.
The pallet wood soaked up the stain more than I wanted
so it was slightly darker than I had anticipated,
but with a little sanding, I'm pleased with the result.
A wax paste topcoat finished the piece.
Some Arizona sun to dry, and hardware on the back and it's done.


Tomorrow I will show you the key image I did with the same type of pallet wood.

Just as a side note, as I was dropping my son off at school today,
I noticed 3 pallets in the dumpster next to his school.

I'm so going dumpster diving today!
I know all the other parents are going to think I'm weird, but I don't care.
All that wonderful pallet wood going to waste?
Not on my watch!

Wednesday, August 21, 2013

Wall Art Week - Part 1


I have been working on stuff lately, just not getting around to posting about it. 
Sorry about that.

So I've been commissioned.

What?

Well I posted a couple of my birds and burlap and pallet wood pieces on a local Facebook group.  One of the ladies on their found me and asked if I would want to put some of my pieces in her store.

Um.. YES!

So now I finally get to play and make a little cash to support my crafting addiction.
Totally a WIN - WIN!

So I thought I'd try doing a little chevron and burlap combination.
It turned out to be way easier than I originally imagined, especially since 
I am extremely math challenged.

So let me show you how I put this little beauty together.

First I covered a few pieces of particle board with burlap and stapled them in place.


Next I pulled out a piece of contact paper.
I'm beginning to really love this stuff.
There are so many ways you can use it.
Today was just one fabulous example.


So I knew there are the little squares on the backing of the Contact paper.
This would greatly help my math challenged brain to make perfect chevrons.
Well almost.
There aren't the squares all over the backing, they take it out for the instructions.
Darn.
So as you can see by my lines I muffed it up a few times trying to get them even and straight.
That's ok.
You don't need the backing really anyway.
After I was happy with the chevrons, I cut them out.


Next I laid them on the burlap and gently pressed them in place.


Here's a close-up.


They are long enough to wrap around the board which was exactly what I wanted.


While strolling through my local Lowe's I found this little tub of paint sample.
$1.25.  Sold!


Now just use a sponge brush and pounce the paint on.


Keep going, moving the contact paper further down as you work.
This contact paper worked for at least 3 boards.
I love it when stuff is re-usable!


After a few hours in the hot AZ sun to dry, I created this word graphic. 
I added the word graphic with my projector and a sharpie.
Easy peasy.  Just like the one I made here.


I love how it turned out.
Happy Crafting!

Tuesday, August 13, 2013

Christmas Wishes - in August


I know it's August.
The kids just started school yesterday.
But it's time to start thinking about Christmas.
Especially if there is some long, involved gift you want to give.
I scoured pinterest and some of my pics for some of my favorites.
Here's the top 10, in random order, of what I'm thinking of doing:


1. Christmas Tree Decor:  A super cute and easy Christmas board.
I think I will make mine out of pallet wood similar to the one by Becky over at Beyond the Picket Fence.


Source: Beyond the Picket Fence

Here's another version I love!
Love this
Source:  Whatever


2. Door Joy Sign:   I'm so loving this front door sign.
Unfortunately the originator page no longer exists.
I will just have to make it up myself.
Shucks!
.
3. Paper Dolls:  My girl would love this paper doll set.
Although I think I would laminate and magnitize each piece.
Unfortunately the original blog no longer exists.
What's up with that?  Anyway the idea is super cute!

Paper doll sets. Great gift!
4.  Fabric TeePee:  This teepee would be super easy to make with some $1 sheets from Goodwill.  I definitely see this one in my future!

3 twin sheets & hula-hoop & rope - great backyard or camping play area.
Source: Pinterest

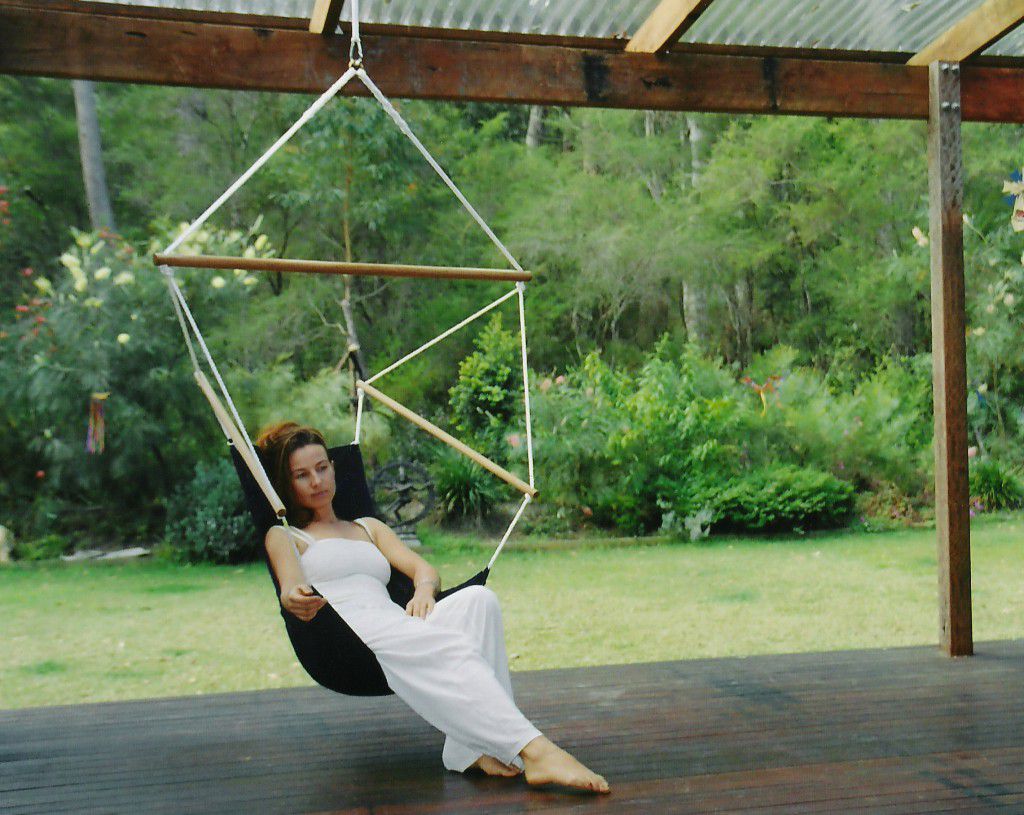
5. Swings:   If I had kids this small again, this would definitely be on my list.  I may just have to make some for my nieces.
The Adult ones are also awesome!


Source: Swingz and Thingz

6. Denim Car Tracks:  If you have little boys, this would be a super easy project with all those old jeans, maybe even head over to Goodwill's $1 days and get some cheap old jeans to cut up.

Source: Lil Mop Top

7.  Family Fun Wooden Lawn Games:  This is a fun family game that would be easy to make as long as you have access to a miter saw.
Of course Martha had to be part of the roundup!

mollky-game-mslb7128.jpg

Source: Martha Stewart

Here's two more wooden family games that would be fun to make:  Giant Jenga

how to: giant wooden block stacking game tower. a.k.a. Giant Jenga to play outsideSource:  Instructables


And Lawn Scrabble


Source:  Constantlylovestruck

8.  Tree House:  This fun tree house would take a bit more carpentry skills than I have but it would be super fun for boys or girls. They have several different kinds to choose from.  I'm really liking the garden gnome theme they have going here.  Super cute!  I would like mine to come apart for easy storing.  Hmm... I may have to ponder that one a bit, or just buy one from them.

icon
Source:  Squidoo

9. Fabric Lego Bag/Play Mat:   I love this Lego bag but I would make a few changes.  This is a definite project in my future.  I have lots of Lego lovers in my house and this would be a perfect gift.


Source:  Freshly Pieced

10.  Family Puzzle:  I saw this last one and loved the idea but I would totally change it.  I would mod podge family photos on each piece instead of scrapbook paper.  Either one giant group photo cut up or individual photos of each family member.  This is another definite project on my horizon.


Source:  Ooops, I craft my pants

What will you make for Christmas this year?
It's time to get your craft on and start planning, hunting, and creating.

As of this minute there are only 133 days, 15 hours, and 26 minutes until Christmas.
Thank you xmasclock!


Monday, August 12, 2013

A Pretty for Me Time


Hip Hip Hooray!

All my babies are finally back to school. 
It was a little crazy there at the end because the start date had to be pushed back a few days.  
It really threw us all for a loop getting all geared up for school to start and the find out we had another week of summer vacation.  
I'm not complaining too much, we did get to do some fun things together before the grind started back up. 

I've just been missing 'ME' time.  

Since all my kids are in school full time now, it means several hours of whatever I want.  
Usually that means crafting, cooking, and a little exercise.  
Not necessarily in that order.  
I do have plans to refocus my goals personally and physically.  
But more on that later.

I've been dying to create something beautiful just for me.  
It turned out that I forgot about my friend's daughter's sweet 16.  
So this bracelet ended up as a gift to her.  
She leads the singing in church and she wore this bracelet.  
It was fun to see her lead with my pretty charm bracelet on her wrist.

But enough gushing.  
Let's get down to business.

You will only need a few supplies for this bracelet.

I used a sheer ribbon, but really a satin one would work just as well.  
Pick your favorite color...  match a favorite outfit.  
The sky is the limit!  
I also used some head pins, beads, a few charms, 
jump rings, some clamp ribbon ends, and a toggle clasp.  


First create the bead charms with the head pins and the beads.  They are easy to make.  Just slide the bead on the head pin and coil the remaining wire into a loop like shown.


Now decide where you want your charms and thread them on the ribbon.  I tied a knot in the ribbon for each charm to keep them in place and eliminate them all sliding to one side.

Measure your wrist and decide how long you want the ribbon to be.
Add the Ribbon clamp ends.


Finally add your jump rings and toggle clasp.  Super quick and done!


I'm so happy to have some 'Me' time again.
What will you create in your 'Me' time?
I'd love to hear about it!