Tuesday, April 10, 2012

Pressuring Chicken

 It's coming into canning season again.  I love it!  Plus my bottled chicken was all gone.  I use it regularly in Chicken Noodle soup.  I just realized I haven't posted that recipe.  I promise I will do that soon.

Anyway, I've discovered that Costco Business is a great resource for bulk chicken.  It's not really cost effective to get it at the grocery store, unless they are having a screamin' deal on boneless chicken.

I've also learned that there are more than 2 Costco Businesses.  One in Lynnwood, WA, one in Phoenix, AZ, one in Las Vegas, NV, and one in San Diego, CA.  There may be more now, but those are the ones I know about.  I've been lucky enough to live reasonably close to 2 of them.

When I tell people about it, they always ask if you have to have a special card to get in. Nope. Just your regular Costco card.  I try to make a trip there between once a month, and once every other month to stock up on bulk things you can't get at a regular Costco.  Try it sometime.  I promise you will like it, but don't be expecting a regular Costco.  It's not. It's designed for businesses.

All that said, I got 40 lbs of Boneless Chicken Breast for about $56.  Just about $1.40 a pound.  They have all kinds of cuts of poultry and beef.  I may try some beef next time, but for now it's Chicken.

The Breast cuts were huge so I trimmed them down.  You can't really tell but I am using a glass cutting board.

Fill each jar with the chicken all the way up to the bottom ring.  Add 1 tsp kosher salt.
Add water to finish filling the jar. I used a chopstick to poke down the sides to release any air pockets.


 Put your lids in a pan of hot water and heat on low until just before boiling.  This softens the rubber on the lids so they will seal properly. When you're ready, fix lids and rings on jars and wipe with a clean cloth to get any raw chicken off the jar or lid.

 Fill your pressure cooker with the jars and hot water.  I can do 9 pints.
Close and screw on your pressure cooker lid.  Follow your manufacturer's instructions for processing.  Mine was for 90 minutes at 10 lbs pressure.  You have to wait until the cooker top weights have a constant movement before you can start the timer.  This takes a while so be prepared.  You also can't leave the pressure cooker alone, so find something else to do in the kitchen for the 2 hours so you can keep an eye on the pressure cooker.  When it reaches pressure, I usually bring down the heat to Medium-Low.

When the time is up, turn off the heat and slide the cooker off the burner. Allow the pressure to come down naturally.  Since it's off the heat, you can leave it alone now.  I ran some errands, then came back and the pressure was gone and I could remove the jars.  Place them on a cooling rack and let rest for about 24 hours.  This makes sure the seals form correctly.  Don't be tempted to touch the lids until after 24 hours. 


Lable the lids with the date and add to your pantry.

I don't know why, but that looks so good in my pantry!

Monday, April 9, 2012

Easter

Here's a quick and belated Easter Post.
 This is my Easter Banner.  I cut egg shapes out of scrapbook paper and pasted it to Cardstock to give it sturdyness.
 I made some Chicks and a Bunny too.
 Then I tied each piece together with ribbon.
 A few more views.
 Now for the Basket.  Super easy and cheap.  A stack of 100 plates was less than $2 at Walmart.  I'll be good for baskets for a long time.  It needs to be the regular old paper ones.
 Cut a 4 inch square out of paper for a template.
 Center the square and lightly trace around the square.  These will be your fold lines.
 Now cut from the edge of the paper plate to the corner of the square you drew.
 Fold up on the fold line and press.  You can use a bone folder here or just your fingernail to get a nice firm crease.
 Now fold in the corners like shown.
 Continue all the way around.
 With your glue stick glue the corners to each other to form the basket.
 Finished.
 Now fill and decorate.  I just tied some cute ribbon around the basket, but scrapbook paper would be very cute too.  Be as detailed and creative as you want to be.
 I used my paper shredder and some green printer paper to make the grass.  I really hate the plastic grass they sell at the store.  It gets everywhere.  This way when they are done it all goes into Recycle.

Happy Easter!

Monday, April 2, 2012

Upcycled Wrap

I love design inspiration. Mine came from this shirt I had in my closet.
 I love the drape and the wrap.  I wanted to try to duplicate it using this mens long sleeve t-shirt.  It worked great. All you need is one long sleeve shirt that is about 2 sizes too big for you. I got this one for free from a clothing swap.  I think next time, I'll go Goodwill Hunting!
Here's the finished shirt.

Now the how to...
 Cut the shirt apart.  All the way.  All the seams and remove the stitching too.
 Find a shirt with a cut you like to use as a template.  Take the back of the shirt you cut up and cut it out leaving 1/4-1/3 inch seam allowance.
 Like shown. Remember the sleeves too.
 Now measure where you want the wrap to come too.  I wanted it to be close to my natural waistline but you could put it anywhere you wanted.
 Cut the swoop saving both pieces.
 Flip the right side over to the left and trim the sleeve holes to match the back piece.
 Using both sleeves you cut from the shirt, cut two new short sleeves for the new shirt.
 Like shown.
 Now with the left over sleeve pieces, we are going to piece together the inside of the wrap.  If I had 2 shirts this wouldn't be necessary, but it will be on the inside and it will look fine.
Seam together the pieces to make a wrap the same size and shape as the first one.

 I top stitched each seam for a finished look.

 Now you have two pieces for the front wrap.
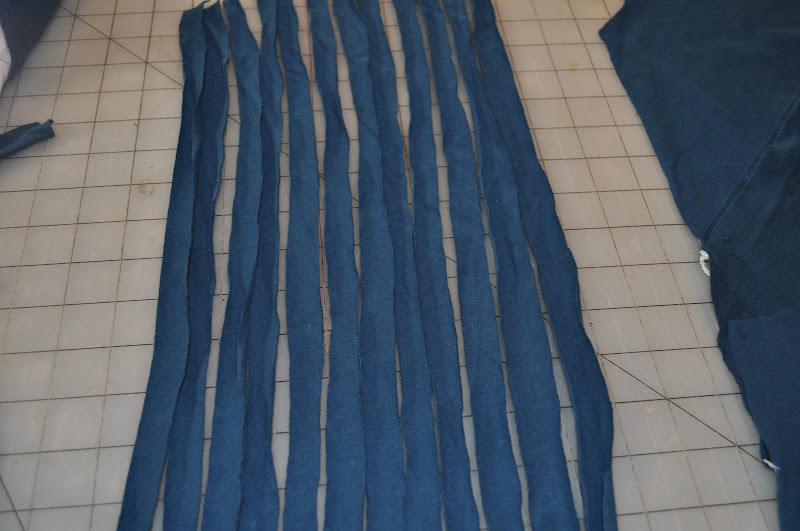
 Let's add some ruffle.  I cut up the remaining pieces of sleeve into strips about 1/2 inch wide.
 Sew each strip together into one continuous strip.
 Gather the long strip of fabric.
 Sew the shoulder seams together making sure they are right sides together.
 Now add the ruffle to the neckline.  I had enough ruffle to double the ruffle on the outer wrap piece.  Feel free to embellish as strikes your fancy.
 For the sleeves, I added a tiny gather to the top of the shoulder to help the fit.
 Now assemble the shirt.  I sewed in the sleeves, then the side seams making sure the whole wrap piece is on the inside since when you turn it, this will be on the outside.  Top stitch the seams to make it look more professional. I did a simple one turn hem on the sleeves and the bottom of the shirt.

Here's the finished top.
Before and after. 


I love it!  Now I need to find another one in a different color.  Maybe add a gather to the shoulder and side seam for more drape next time.  It's so fun to play with upcycling.

Print It Button