Thursday, December 8, 2011

Snickerdoodles

These are my 2nd favorite cookies.  My favorites are found here

They are super yum and easy to make.

Snickerdoodles

Cream together the following until 
light and fluffy:

3 cups sugar
2 cups butter melted

Now add:

4 eggs
Mix well

In another bowl combine:
5 1/2 cups flour
4 tsp Cream of Tartar
2 tsp Baking Soda
1/2 tsp salt
Sift together and gradually add to creamed mixture. Blend well.

The dough will look like this.Spoon onto parchment paper and sprinkle liberally with cinnamon sugar.


 Bake at 400 degrees on a pizza stone  like this one for 8-10 minutes.  Let cool slightly and store in a sealed container.  Makes about 6 dozen cookies.

Beautiful, yummy and ready for your Cookie Exchange!

Wednesday, December 7, 2011

Christmas Banner


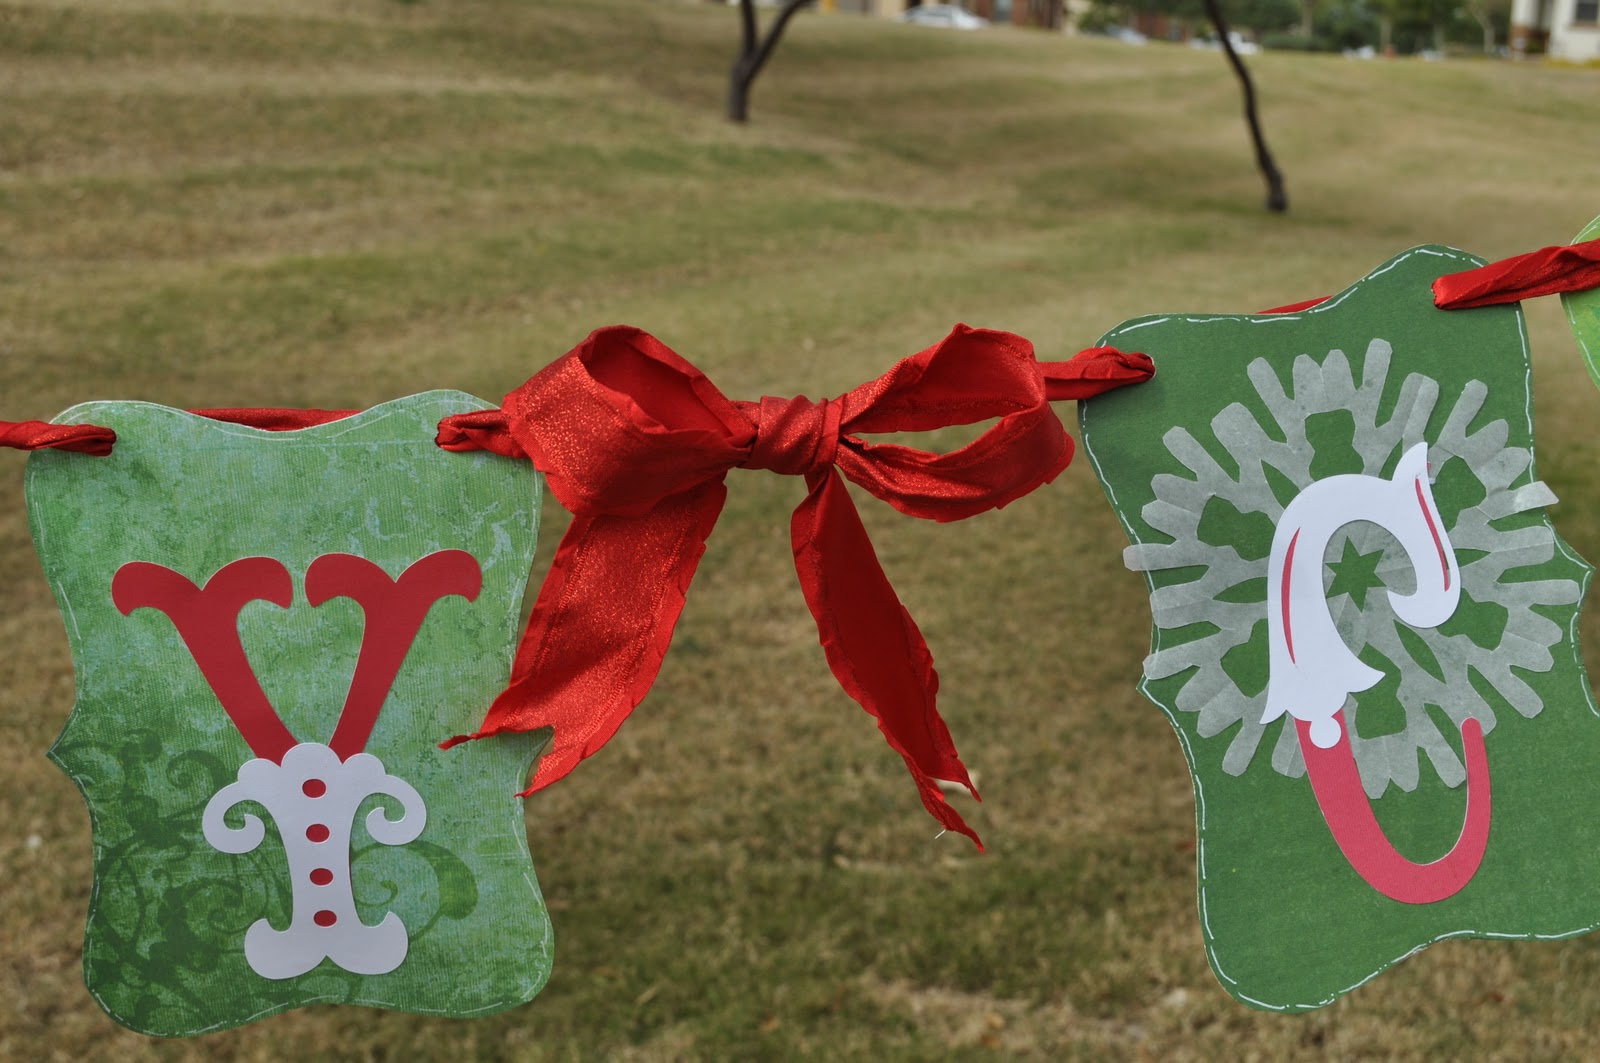
I thought I'd share my Christmas Banner and try taking pics outside for a change.

For some reason, maybe because of Harry Potter, but I like Happy Christmas better than Merry Christmas.  So that's what I put on my banner.  The letters were cut on my Cricut with the Storybook Font.  It has these great additions to the letters that really changes the look.

 The snowflakes are cut from wax paper and they back a few of the letters.
 I decided to join the words with a large bow.  The ribbon came from Costco.

Here's the finished banner.
Happy Christmas to all!

Monday, December 5, 2011

Super Yum No Bake Cookies!


Let me just say that these cookies are dangerously addictive.  
Plus they are super easy to make.  

OK. Disclaimers done, here the how to:

No Bake Cookies

In a large saucepan combine the following:
1/2 cup butter
1/2 cup milk
1 3/4 cups sugar
4 Tbsp unsweetened cocoa

Mix well til smooth and heat over medium until boiling.

Boil for 1 1/2 minutes.  The boiling time is very specific.  It ensures the cookies will hold together properly.


After mixture has boiled for 1 1/2 minutes, remove from heat and stir in:
1/2 cup crunchy or smooth peanut butter
1 tsp vanilla extract
3 cups quick cooking oats

Mix well to dissolve peanut butter and evenly distribute oats.

Drop onto wax paper covered cookie sheet.
If it's cold outside, put the pan in the garage for about an hour.  Otherwise put in freezer to speed up hardening.

Remove from wax paper and 
gobble them up!  
Seriously!  I can't eat just one!


Sunday, December 4, 2011

Banana Bread

I regularly make this recipe.  Everytime I have a few bananas left that are starting to turn brown and spotty.  The kids won't eat them if there is any brown on them, so needless to say I make Banana bread a lot!  Usually I double the recipe and stick one loaf in the freezer for another day.  It freezes well in a sealed plastic bag.
So here's the recipe:

Banana Bread

1/2 cup butter melted
2/3 cup sugar
1 Tbsp molasses
1 tsp vanilla
1 tsp cinnamon
1/2 tsp nutmeg
1 tsp baking soda
1 tsp baking powder
1 tsp salt

Cream together the above ingredients in mixing bowl.  Then add:

3 medium or 2 large ripe bananas broken in to about 1 inch size pieces
3 Tbsp jam - peach or apricot
1/4 cup honey
2 large eggs

Mix well again then add:

2 1/4 cups flour
1/2 cup chopped walnuts (optional)

Mix just until smooth.

Spoon into greased bread loaf pan.  Let rest while oven preheats to 325 degrees.

Bake for 45 minutes. Then lay a piece of aluminum foil over the top and bake for another 25 minutes.  

Let cool, slice and enjoy!

Wednesday, November 30, 2011

Pies Pies Pies Yeah!

I know.  Thanksgiving was last week.  I did make these before Thanksgiving but didn't get the pictures uploaded in time.  Better late than never right?

The crust recipe is from King Arthur Flour.  I love their site.  So much good stuff.  I used to use Martha Stewart's recipe all the time for crust, but I think I like KAF's better.

You will need:
2 1/2 cups unbleached pastry flour, or all purpose flour
3/4 tsp salt
Sift together or use pastry blender to combine flour and salt.

Cut in:
1/3 cup shortening (if you rinse the measuring cup with cold water first, it will help the shortening to come out easier)
1/2 cup cold unsalted butter
1/2 cup plus a few tablespoons more of 
ice water

 I keep a glass of ice water ready as I cut the butter into small cubes.
 Blend together flour mixture, butter and shortening.  Add ice water 2-3 tablespoons at a time until dough holds together but is still a little dry.  I think I added a total of about 8-9 tablespoons of ice water.

 Pour batter onto parchment paper.  Sprinkle with water if still to dry.
 Fold parchment over and press.  Rotate and repeat about 7-8 times to get a nice ball of dough.

Wrap dough in plastic wrap and shape into a circle.  Place in fridge for at least 30 minutes.  NOTE: this is a must!  It makes the dough so much easier to work with.


 After dough has rested turn out onto well floured parchment paper. Turn to coat dough for easy rolling.  add another sheet of parchment and roll out.

 Place pie dish on crust and flip over to put crust in pan. Gently press in place and trim edges with a little extra dough on the edge.
 Turn top edge under as shown.  This gives a thicker nicer edge.
 Flute edges as desired.
 I cut little leaves and added a stem line with a knife to each leaf.
 I used a 2 quart jars of apple pie filling from here, minus a little of the syrup.
Arrainge the leaves on top and brush with egg whites.
 Bake at 400 degrees for about 45 minutes.  Let cool slightly and enjoy!

 This was a blackberry pie I had to put in a sqare pan since I ran out of round pie pans.  Still super good though!
MMMMmmmmm warm Apple or Blackberry Pie.  Delish!

Tuesday, November 29, 2011

Mason Jar Soap Dispenser

Did you know you could make your own soap dispenser in a matter of minutes?  Yep.  I did. And with stuff you probably already have.

I used a spagetti sauce jar and the pump from a shampoo bottle.

Drill a hole in the lid. (I was a little nervous about drilling but it worked pretty well.  Just be careful.)  I spray painted mine before drilling, but when I do it again I'll wait until after drilling.

 Cut the end off the pump to fit the jar.  I used a hair band around the pump to secure it in place.  A large rubber-band would work too.  Fill the jar with soap and you are done.  So easy!

 Super cute!  I love it on my counter!

I made another one for my bathroom.  The cotton ball jar has a regular glass votive cup in the top.  It fits perfectly!  The jar in the middle is a vintage one I had.  So nice and easy!  Love it!

Monday, November 28, 2011

Petticoat Skirt Tutorial

So it's time for family pictures again and I wanted something super cute for my daughter to wear.  I've been looking for a while and still didn't find anything.  I decided I needed to make the skirt I wanted for her and it only took less than an hour and a half.  Here's how.


I used a twin size bedsheet in tan.  Trim the seamed edges off.  I used 3 strips lengthwise.  Cut a little at the end and tear the rest of the way.  So quick and easy.  Each strip was about 4 inches wide.  


I tore another strip about 3 inches wide for the flower.  Fold the 3 inch strip in half and gather.  I love my gathering foot for my sewing machine!


It's not one continuous strip but you could sew it that way if you wanted.

Make a simple A-line skirt to fit your little girl. Seam the sides of the front and back together.

Next I pinned the ruffles in place.
 One goes all the way around the back and makes kind of a V in front.  I added a small piece of ruffle under the V.  Stitch the ruffles down.
 After you have added all the ruffle, I used a cereal bowl to loosely mark a large circle to use as a guide for the flower.

 Here's the flower loosely placed to make sure I had enough ruffle for the space.
 After the flower is sewn down, cut a casing for the waistband.
 Cut a piece of elastic to fit and pin the four corners.
Pin the elastic in place and serge or zig-zag.

 Fold over the casing and stitch down.  And Done!


It's so  stinkin' cute,
I want one too!

Print It Button