Another day, another fun tutorial.
In Jessica Sprague's class she taught us how to use clipping masks and textures. Since not everyone has access to her class and the free downloads, I thought I'd teach you how to make your own. It's super fun and easy and it is totally your own.
First open a new document, but when you do, make sure that the background is transparent. I saved mine that way, but I'm not sure it will show up here that way. It should look like a gray and white checkerboard.

Now you have the new document with a transparent background. Now, create a new layer, and click on the
Rectangular Marquee tool. It should be at the top of your tool bar and it looks like a square in dotted lines. You can change this to a circle by right clicking on it, but for this, I want a rectangle. Draw a rectangle by clicking on the top left corner of your document and dragging it to the right bottom corner to nearly fill the space. You will have the marching ants rectangle. Now find the
paint bucket tool. It looks like a paint bucket pouring out. Click on that, then click somewhere inside your rectangle. This will fill the space with whatever your foreground color is. Mine is black. It doesn't matter what the color is, but black makes it easier to see. It looks like this:

Hit
Control + D to deselect and get rid of the marching ants.
Now for the fun part. Below your layer's pallet is a square with a circle in it. If you hover over it, it will say
Vector Mask. This is what you want. Click on that and another rectangle will appear next to the first rectangle in your layer's pallet. Now make sure the color swatch has black on top.
Black erases, White restores. Select your
brush tool. Choose a brush that looks like a paintbrush has just dabbed one spot. You should have several in your default brushes. I used 3 different ones and got different effects each time. I set he size to be around 100 pixels to get it big enough for me. Now paint around the edges of your black rectangle. It will erase part of it. If it is too much, either hit
Control + Z, or change the foreground color in the color swatch to white and paint again. It will bring back what you erased. I also played with the flow and the opacity sliders that are at the top of the tool bar. Keep playing until you get a look that you like. I made 2. Here they are:


Play with your brushes to get a look that you like. I think I will go with the second one.
Now open a paper or a photo you want to clip to this mask. I opened a blue paper I had to see what the mask would look like. When you open it, use the move tool to drag it on to your mask. It should be on top of the mask so you can't see it. Now move your cursor to the line between the blue paper layer and the photo mask layer and hit
Alt + Click. When you hit alt, a double circle will appear. This shows you that a
clipping mask will happen. When you alt + click, it should look like this:

Now let's see what the same mask looks like with a photo. To change it, drag the blue paper layer into the trash can icon below the layers pallet. Then open a photo and drag it on to the mask. Again hit
Alt + click as you hover your mouse on the line between the photo layer and the mask layer to create the clipping mask. Mine looks like this:

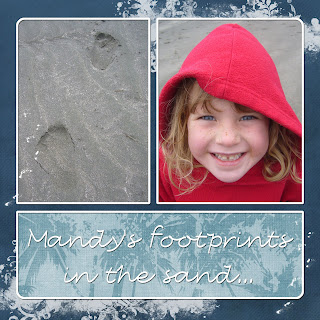
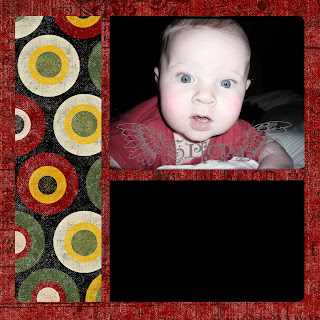
I really like it and would totally use this on a layout, but let's kick it up a notch, well, just because we can. I opened a brown paper because the blue with my photo didn't work. Next, drag the brown paper over to the photo mask document. It's OK if it's on top. We will move it in a minute. Now I like this paper, but lets add a pattern texture to it. With your mouse over the brown paper, right click to open a dialog box. One of the options should say
pattern. Click on that and it will open another box with some default patterns in it. Or you may have some from
www.brusheezy.com. They have some super cute ones for free. I chose one I got from another class I took. When you have selected the one you want hit OK. It will automatically take you back to your origional document. Don't Freak! I know you can't see anything but the black and white pattern. Go to the
opacity slider above the
layers pallet. I moved mine down to about 25%. Move it around to get the look you like. Now hover your mouse over the line between the pattern and the paper layer and hit
Alt + click That will clip the pattern to only the paper. It will look like this:

I really like this. The paper layer should be highlighted. Hit the
shift key while you click on the pattern layer too. This will select both layers. Now click and drag both layers below the photo mask layer to move the paper to the background. It should look like this:

Let's see what the photo will look like with a pattern layer applied to it too. You can do the preceeding steps again to create the pattern layer, or click on the pattern layer you already have, then hit
Control + J to create a duplicate layer the pattern layer. Drag that layer above the photo layer and reduce the opacity. Hover on the line between them and hit
Alt + click again to clip it to the photo. Now you are done. Here's what mine looks like:

Cool huh! I love playing with brushes and texture! Have fun creating! Plus when you are done creating your own grungy photo masks, save it as a .psd file, name it photo mask, and you can use it over and over again. The best part is that it was FREE! Gotta love it!


 Now in CS2 I have to rasturize that layer by right clicking on that layer in the layers pallet and selecting
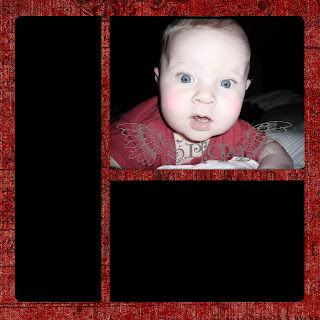
 We need to separate these layers so we can clip different elements to them. Use your rectangular marquee tool again and select one of the shapes. Make sure the large shape is hightlighted in your layers pallet. Once one of the smaller shapes has the marching ants around it, hit
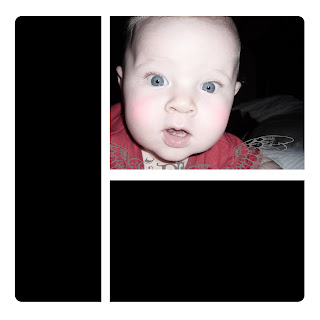


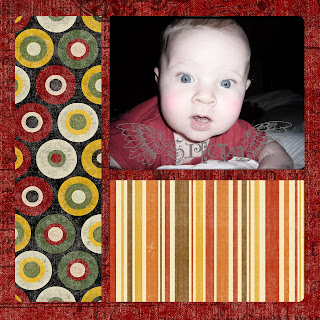
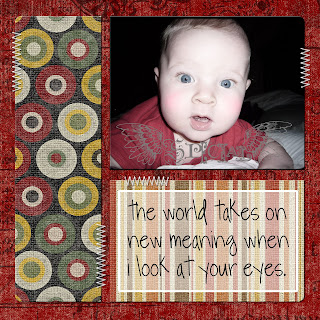
 Now I want to add a text box to my layout. I did this by adding a digital piece of vellum to the striped block. Use your
  Now reduce the opacity to about 75%. I added a stroke outline to the outer edge of mine.

 Have fun with creating your own templates. It definitely makes scrapping quick and easy!


