Monday, September 24, 2012

Slipcovers and #10 Cans

I don't know about you, but I have a ton of #10 cans.  You know, the biggest ones there are.  Usually it's what the canned peaches come in at Costco.  I also have alot of my food storage in them.  We have been rotating our reserves and I ended up with a lot of empty cans.  I can't re-seal them and I just couldn't bring myself to just stick them in the recycle bin.  So I came up with some easy slip covers for the cans to easily organize toys and other miscellaneous things.  Now that I have the design down, I plan to make a bunch more, and with all the different fabrics, really the possibilities are endless.  
Here's the how to:


You will need 2 pieces of fabric that are 20 inches by 7 1/2 inches.
and a circle that is 6 1/2 inches in diameter.

I added little windows for my labels, but that is totally optional but I'll show you how I did it.

 First I cut a piece that was the size I wanted.  Probably about 4x6 inches, then cut a piece of paper to help me create the window.  Mark the corners of the paper about 1/4 inch away with a pencil like shown.


 Match up the opposite pencil marks by folding the fabric.


Cut straight to the pencil mark as shown.
Repeat for the other side to create an X.

Lay flat with the wrong side up.


Press the flaps flat to create the window.

 Trim the excess off from the flaps.
Stitch the window and the top edge which will be the opening.
Pin the window on the 20x7 1/2 inch piece of fabric.  Turn the edges under and stitch in place.

Sew the short ends ( 7 1/2 inch sides ) together to form a tube. Do this with both pieces of rectangular fabric.
Hem the bottom edge of these tubes.


Now for the bottom.
Fold the circle in half and finger press to mark the lines.  Put pins in to help mark the creases.


Do the same with the tube without the window.  Pin in place matching the circle pins.


Stitch the circle into the tube.  It should fit without much trouble or easing the fabric together.
Pin right sides together of both rectangle tubes and stitch together.
Turn and slip over your can.
Decorate as desired.


I made some white ones for my girl to keep her hair bows, jewelery, and other pretty things in on her dresser.


 The boys got some Brown Courdoroy ones for their toys.  I made the cards in Photoshop using CK Kiddo font.
I printed them on cardstock and will laminate them.


The cans fit perfectly under my little boy's bed and will definitely make clean up much easier.


Here's to thrify up-cycling to organize my kiddo's life!

Friday, September 21, 2012

Whole Grain Orange Rolls

This is a family favorite that I learned how to increase the whole grain-y goodness from another class at Shar's.
In the class they made them into dinner rolls and then drizzled the orange glaze over it.  
While it was yummy, I like the cinnamon roll style. 
 More Orangey yummyness.  
They are light, whole grain, and heavenly!  
Let's get started.

Whole Wheat Orange Rolls

Zest and juice two large oranges.  Set everything aside for later.


Grind your whole wheat flour.  
You will need 3 cups to start, plus more to form the dough.
My favorite grain blend is 1 cup hard white wheat, 1 cup hard red wheat, 1 cup soft white wheat, 1 cup kamut, and 1/2 cup quinoa.


In your mixer combine the following:
3 cups fresh ground whole wheat flour
1/2 cup buttermilk powder or powdered milk
1/4 cup potato flour
2 cups high gluten flour
3 Tbsp Yeast
3 Tbsp dough enhancer

Mix thoroughly so the milk powder will not form lumps.

Then add wet ingredients:
3 cups warm water
1 cup orange juice
Zest of 1 orange
1/2 cup honey
1/2 cup coconut oil

Mix for 2-3 minutes.  Cover and let sponge until dough doubles in size like shown.


While dough is rising prepare orange filling.
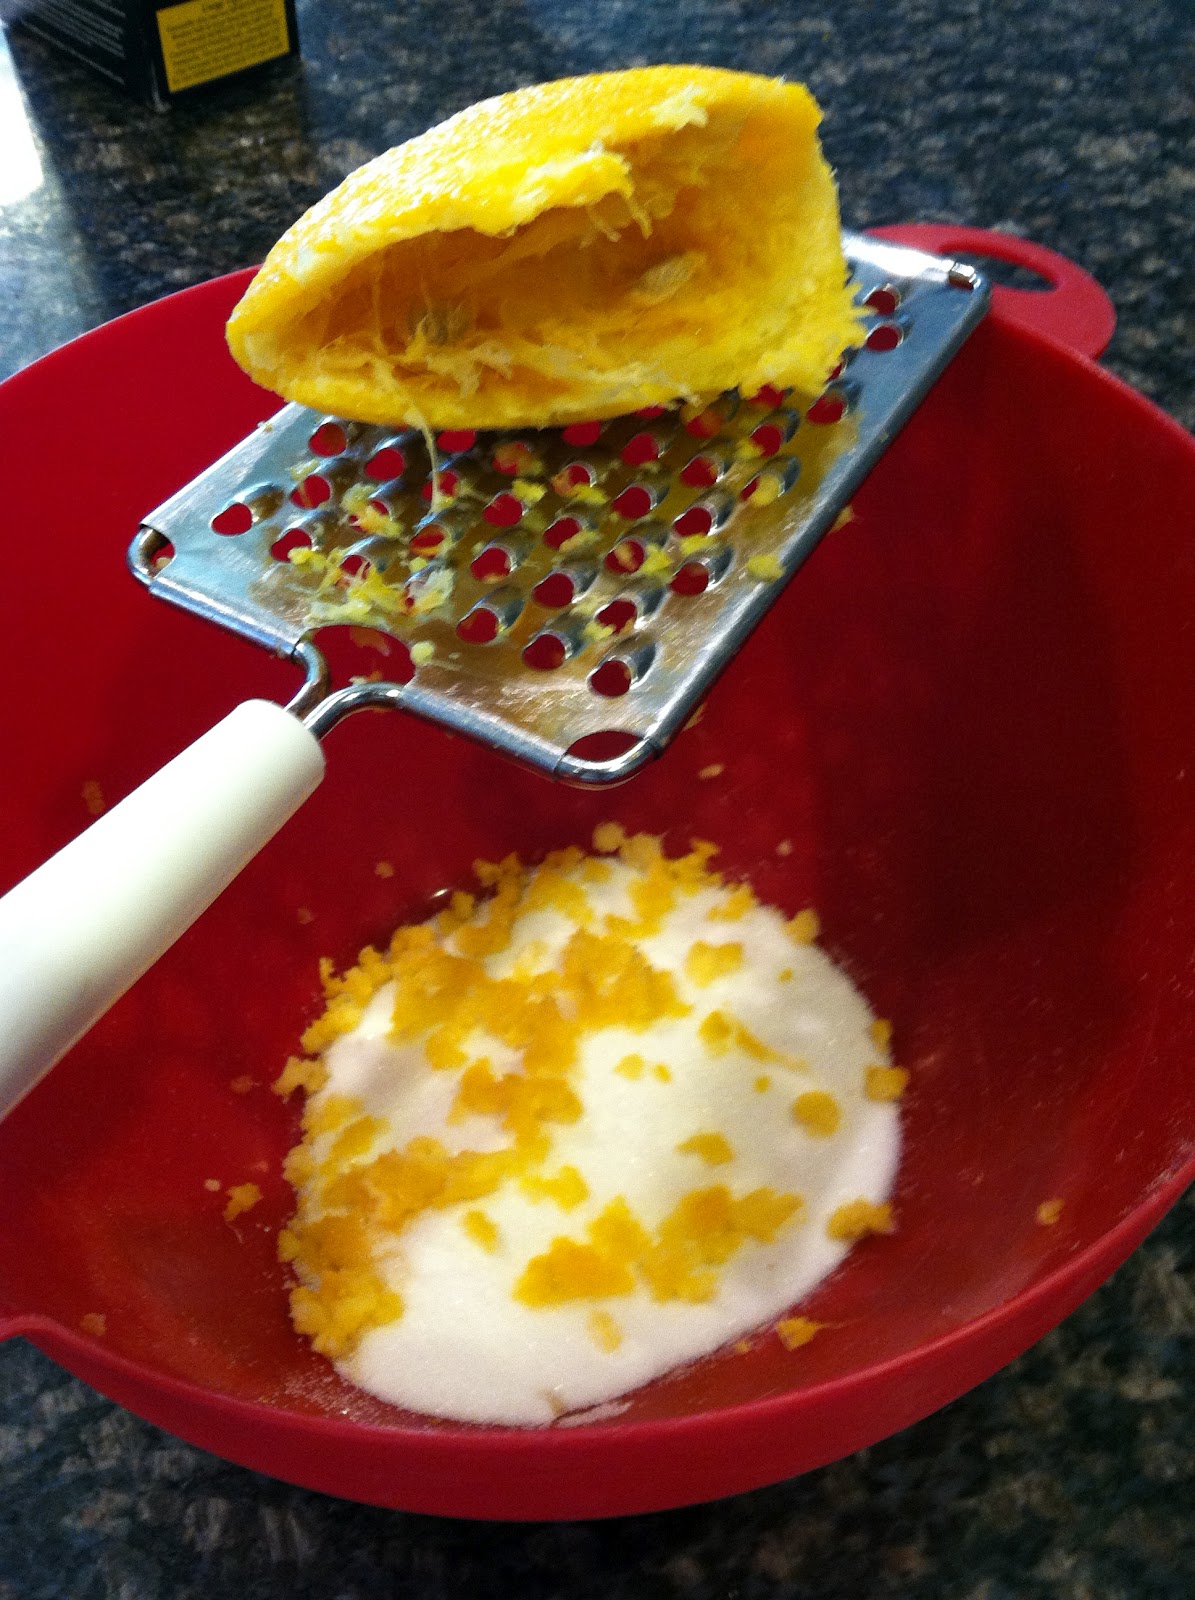
Grate the orange peel to get a couple of Tablespoons of peel.
Did you know that the white part of the peel is actually the most nutritious?  
Plus you're getting more orange flavor that is super yummy.

Combine 2-3 Tbsp peel with 4 Tbsp Orange juice, more if necessary to make a soft frosting consistency. 
1 1/2 cups powdered sugar
 It's OK to add a little water to make the frosting easy to spread.

You will be using 1/2 the frosting per roll.

To the sponged dough add:
2 eggs slightly beaten
1 Tbsp sea salt

Mix while adding more fresh ground whole wheat flour until the dough cleans the sides of the bowl.  Dough should be slightly sticky.  Knead on speed 2 for 6-8 minutes until gluten develops and dough is silky and beautiful.


 Divide dough in half and roll out one piece on oiled surface to large rectangle.  Drizzle 1 Tbsp olive oil over the dough and brush to evenly spread over dough.


Now spread 1/2  frosting over dough leaving one side uncovered so you can seal the roll.


Roll up dough cinnamon roll style and pinch end to seal.
Slice with dental floss into about 1 inch rolls.


Place rolls in greased 9x13 inch pan.


This is a large batch so if you don't have a large family, plan on giving some away or freezing them for later.  With teenage boys, these won't last long at my house.


Preheat oven  to 350 degrees.  Let rolls rise while oven is preheating.
Bake for 15-20 minutes intil golden brown.

Glaze:
1 cup powdered sugar
3 Tbsp orange juice
1 Tbsp orange grated orange rind
1/4 tsp sea salt
1 cap full of Fiori de Sicilia
(this really makes a huge difference)
Add enough water to get a light glaze and drizzle over rolls as soon as they come out of the oven.

Wait as long as you can stand it to let cool slightly and dig in.


 I tucked some into my kiddo's lunches. 

When I make them again, some of my close neighbors might get some.  
Maybe.


Tuesday, September 18, 2012

Homemade Whole Grain Buns


The inspiration for these buns actually came from 2 places.  
The recipe came from Shar's Kitchen Center, although I slightly modified it for my taste. 

If you are new to their store and purchase something, mention you heard about them from me, and we both get entered into a drawing for a $100 gift card.  Win-Win for both of us! The contest drawing will be at the end of September and another one in October so you have time to find something fabulous at their store, which I guarantee you will!

The other was a science fair project from my kiddo's school last year.  
Science Fair, really?  Yep.  
One student did a comparison between a local Fresh Burger place, Joe's Farm Grill, and a McDonald's meal. 
 He put a hamburger and fries, no condiments, inside a sealed glass jar and 
left them out on the counter for 1 month.  
The results?  The Joe's Grill burger was pretty much a gelatenous mess.  
The McDonald's? Nearly exactly like it was the day you bought it.  

I realized how much preservatives go into their food and I swore never again.  
And really store bought buns are pretty much the same.  Try it. 
 Buy a bag of buns and leave them in your pantry for a month and see what happens.  
 I promise you'll be surprised that they look exactly the same.  
So after going to Shar's class, I will forever after be making my own buns for Burgers, Hoagies, and Dogs.  
You can shape the dough into whatever you want.  
Plus they are whole grain and packed with super yummy-ness! 
So let's get baking!

Whole Grain Italian Herb Hamburger Buns

In a Bosch mixer with dough hook, combine the following:
3 cups warm water
1/2 cup canola or olive oil
1/3 cup honey or agave

The recipe says:
1/4 cup potato flour
1/4 cup buttermilk powder

I didn't have either so I added:
1/4 cup powdered milk

2 cups high gluten flour (optional)
3 cups fresh ground Whole Wheat Flour
(My favorite blend is 1 cup each of Hard white wheat, Hard Red Wheat, Soft White Wheat, Kamut, and 1/2 cup quinoa but really it's up to you)
2 Tbsp dough enhancer
2 Tbsp SAF Instant Yeast
1-2 Tbsp Italian Seasoning
(I added 1 Tbsp dried Basil and 1 Tbsp herbs de provence)
1/4 cup toasted dried onion flakes
Optional:  1/2 cup blend of popped amaranth, flax, sesame seeds, 9 grain, millet, & or Sunflower seeds)

Knead on speed 2 for 2 minutes.
Cover and let sponge for 10-15 minutes.


After it has Sponged, add:
1 Tbsp salt
2 eggs (optional for lighter texture)

Continue to add enough fresh ground whole wheat flour to clean the sides of bowl.  Dough should be soft, not sticky.  Knead for 6 minutes more to develop gluten.

Optional: near the end of the kneading add 1 cup coursely grated cheddar cheese.  
I left it out and they were still super yummy.


I picked up these baguette pans at Shar's and was anxious to try them. It gave the buns those fun little polka-dots on the bottom of the crust.  Almost like store-bought, but a bazillion times better for you.


Shape dough into smaller than you think bun sized pieces.
Brush with egg wash - 1 egg plus 2 Tbsp water.
Let rise til double in bulk.

Preheat oven to 350 and bake buns for 15-20 minutes.


I ended up with more dough than would fit on my baguette pans so I used some parchment paper.  They still turned out fabulous.


Beautiful Whole Grain-ey Goodness!


 For Dogs and Hoagies, these buns can't be beat!


Monday, September 17, 2012

Projectors and Burlap part 2


I finally finished my Burlap wall project.  It took a little while to assemble all the things I used in this collection, but it's done and I love it. And I only spent $5 on the shelf.  Everything else I already had, or made.  Here's the original post where I made the clock pieces.
After it was all done, my husband said it looks like something from a magazine.  Sigh.

Here's the original Clock face I got from Graphics Fairy.
I combined her Clock face and Chocolate lable to create this combination.
Next I used the paper method I learned from Pottery Barn to decide where the elements would go.  You can watch the how-to video here. I also marked where the studs were with the pink post-its.  

I made these 5x7 graphics to go in my little black IKEA frames I had painted years ago.  It was time to dig them out and give them a new life.  The lyrics are from our song, Bless the Broken Road by Rascal Flatts.  I used Jellyka Western Princess font.  The keys came from Graphics Fairy and I added a script brush for the background in Photoshop.  Just a little more vintage to the look.  Then I printed them out on gray cardstock and cut them to fit my frames.  I really love how they turned out.              
I needed a pretty knob for my sign so I made one out of a large head nail, glue dots and a vintage button I found in my button stash.  Super easy to put together.  Hammer the nail in place and add glue dot to the nail head.  Then firmly press button in place and you're done.  Super easy and totally customize-able!


Here's a close-up of the knob in place.


 Here's the overall view.  Now for the elements.


Vintage Keys.


Here's the Pottery Barn Shelf I got at a thrift store for $5 and refinished using vaseline and paint with some heavy distressing.  
I super-love how it turned out!


This is actually cardboard and some ripped up sheets.  I followed a similar method to when I made my Fabric Wreath.  Only this time I just glued the ruffles in a circle spiralling to the center.  I cut out the C from some scrap beadboard, painted it white, and stained it with ebony stain.  The top is a vintage button with a plastic drapery circle to use for hanging all sewn together.


Last was this board that I cut, routered, and attached some clearance votive holders with cording. Then I filled them with some large cream colored silk flowers.


Here's a close-up of just the burlap clock.  I added some vintage apothecary jars, a tiny frame and a large red vase to the ledge to finish the look.


And done.   So pretty!

Print It Button