Thursday, May 19, 2011

Artisan Bread

My sister sent me this recipe for homemade Artisan Bread. Of course I added my secret grain blend of:

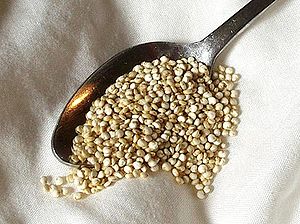
and quinoa to the mix.

Here's the Recipe:

Artisan Bread

In a 5 quart container that has a fitted lid mix the following:

3 cups lukewarm water
1 1/2 Tbsp yeast
1 1/2 Tbsp kosher salt or other course salt
6 1/2 cups flour
1 cup 11 grain blend (optional)

Mix in the flour 1 cup at a time, stirring with a wooden spoon. Kneading is unnecessary! You want a moist dough, but not runny. You may have to adjust the flour amount to get the right consistency.


Sorry my pictures are kinda crappy. My camera was being funny. (not ha ha...)Loosely cover the container and let sit on your counter for about 2 hours. Then tightly cover the container and place in your refrigerator for at least 3 hours or overnight.

I wanted to try baking the bread in my dutch oven in the oven since we had great results baking it over coals in the fire pit. So I lined the dutch oven with tin-foil and sprinkled semolina flour around the bottom. Cornmeal will also work in place of the semolina.

Preheat your oven to 450 degrees with the dutch oven inside.

One batch of dough will make 2 large loaves in the dutch oven. Separate out half of the dough and gently shape in to loaf. No need to knead!
Remove the dutch oven when the oven is done preheating and place dough inside.
Replace the cover and put in oven. Bake for about 35 minutes. The recipe says to slash the top of the dough with a serrated knife. I forgot to do that so the top is, well you can see. Not terrible, but not pretty either.
Let bread cool mostly then slice and enjoy!

Our friends love dipping bread and this works wonderfully! A little Balsamic Vinegar, Olive oil, and salt and pepper and you are good to go!

Personally we love oven roasted garlic bread.

Slice up bread and butter one side. Sprinkle with garlic salt and reform loaf. Wrap with tin foil and place in a 350 oven for about 15-20 minutes.
Remove, unwrap and, mmmmm.... Garlicy Heaven!
(Sorry there are no pictures. Too busy eating!)

Wednesday, May 18, 2011

A Family Favorite


Another signature dessert from my mom-in-law.

Plus you get to break the #1 rule in crock-pot cooking. Who-hoo! Who wants to break some rules once in a while?

Rice Pudding

In your crock-pot combine the following:

8 cups milk (any kind works, but it all depends on how creamy, I mean fattening, you want the rice pudding to be.)
1 cup rice (not brown)

Stir a little and cover. Set crock-pot tohigh for about 1-2 hours.

Now for some rule breaking!

The #1 rule in crock-pot cooking is don't lift the lid until the food is done cooking.

For rice pudding you need to stir it about every hour or so, whenever youremember to do it. I've put some on and left it while we went to church so it's OK if it isn't stirred that often.

Keep the temp at High for about 1-2 hours, then turn it down to Low.

Cook and stir for about 5-6 hours or until it gets a tapioca consistency. When it reaches this point, turn off the crock-pot and add the following:

2-3 beaten eggs (raw)
1 cup sugar
1 shake salt
1 Tbsp vanilla

Stir like crazy to cook the egg and dissolve the sugar, about 2-3 minutes.

Ladle into bowls and sprinkle with cinnamon sugar, raisins, nuts, or whatever other mix-in you like.
Sooo Good!

Thursday, May 5, 2011

Corsage for Mom


I'm usually a day or so late getting my holiday projects done, but this time I made it with a few days to spare. Fwewh!

I saw this flower on Make it-Love it.
I thought I would make a bigger one as a corsage for my Mom and Mother-in-Law, and myself.
It was quick and super cute.

So Mom, if you are seeing this before Mother's Day, yours is coming.

Cut about a 5 inch strip of satin or similar fabric. Iron flat.

Fold in half and press.

Next, serge or zig-zag the edge, starting at the folded edge curving toward the cut edge like this.

Next gather the strip of fabric.
(I have so missed my gathering foot for my sewing machine. I finally got my industrial machine accessable again.)

Cut out 2 small circles and serge the edges. The serger doesn't want to curve very well so they ended up more like pentagons than circles. It's Ok.

Get out your bar pins and hand sew to the top edge of one of the fabric circles.

I forgot to take a picture pre-gluing but here's what the back looks like.

I used this Fabric glue to form the flower.

Next start at one end and glue and roll about 2-3 inches of the end to form the center of the flower.

Starting from the outside of the fabric circle, glue the ruffle in a spiral working toward the center. Be sure to leave a little open space in the center for the tight roll you made. When you get to the center, cover the bottom of the tight spiral with glue and press into the center of the flower to adhere in place.

I made 3 of them and they each turned out a little different, but each beautiful.

Pin in place and you are ready to go!

Happy Mother's Day!

Tuesday, May 3, 2011

Sneaky Pizza Night

My family loves homemade pizza. They would have it every day if I'd allow it.

So since we have this often, not every day mind you, but often, I needed to make it a little more healthy so I have some secret weapons to increase the nutrition.

First is Bob's 10 Grain Cereal.
I make a batch of this at the beginning of the week. I add it to my bread, or eat it for breakfast. When I cook it up, I add Quinoa.
10 Grain Hot Cereal
Quinoa is pronounced Keen-Wa. I'm not sure where that pronounciation came from but there you go. It is the most healthy grain in my opinion. It is a complete protein. No other grain can make that claim. It also adds a nutty flavor to your foods.
So good!

Next is my Garlic Powder. A must for pizza.

So here's the recipe:

Sneaky Pizza
Makes 2 large pizzas, or 2 medium pizzas and 2 bread sticks.

In your mixer combine the following, layering the ingredients:

2 1/2 cups warm water
3 Tbsp honey or sugar
1 1/2 cups cooked grain cereal or oatmeal
3 cups flour
2 Tbsp yeast

Mix well. It will be runny. Cover and let sit to "sponge" for 10-15 minutes. Then pulse to release air.


Next add the following:

4 Tbsp olive oil
1 cup flour to separate sponge from salt.
1 tsp salt
1 1/2 tsp garlic powder
(Feel free to adjust salt and garlic powder amounts to your taste. I have also used sea salt or kosher salt in place of the iodized table salt with excellent results.)

Mix adding flour until dough cleans the sides of the bowl. Add about 1/4-1/2 cup more flour. Knead for 10-15 minutes.

Separate dough into 1 3/4 to 2 lb size balls onto floured surface. Let rest for 5-10 minutes.

After it's done resting, you can shape your pizzas. It's great for the kids to help.
Be sure to add flour as needed to keep it from being too sticky.

Preheat oven to 450 degrees.

Next get out your parchment paper. Sprinkle semolina flour on parchment to keep pizza from sticking.

Assemble your ingredients. We recently discovered how good real bacon is on pizza. It was an accident because I forgot I didn't have any Canadian Bacon.
I must say, Real Bacon is much better!Roll out your dough and cut with a pizza cutter to make breadsticks.This batch I added a little cheese.

Bake for 8-9 minutes. I bake mine on my Pizza Stone. If you don't have one you can put the parchment directly on the wire rack in your oven. When the breadsticks are done, brush with Olive oil and sprinkle with garlic salt.

Top your pizzas with sauce, cheese, and your favorite toppings.
After baking, let cool slightly to make cutting easier.

Enjoy!

PS. You can use this dough to make pizza roll-ups or calzones. I've done both and they are super yummy!

Print It Button