Showing posts with label wall art. Show all posts

Monday, October 7, 2013

Ombre Pallet Wood


I really like playing with wood and paint.
This piece was super fun to play with.
I took the color combination idea from Beyond the Picket Fence
and made an Ombre version.

Keeping with the bird theme I have going right now, 
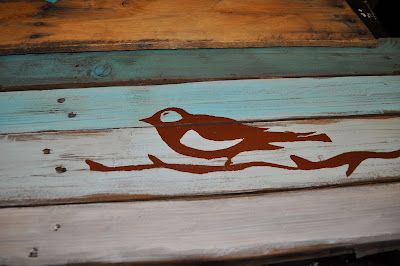
I had to add a bird on a branch.
However, Becky over at BTPF uses stain on her wood.

The little disclaimer about not storing used stain rags 
kind of freaked me out.
I definitely don't want to burn my house down 
because of some stain rags left in my garage.
So I went back to the super easy 
and cheap method of steel wool and apple cider vinegar.
It produces the same staining effect, at a fraction of the cost and 
vinegar isn't going to burn my house down.

Remember the longer the steel wool sits in the apple cider vinegar,
the darker the color you get on the wood.
I left mine in for about 24-36 hours.
The steel wool was pretty much disintegrated so I used a cut up piece of sponge
that was left over from a youth activity our church had recently.

Instead of water balloons, they used sponges to have a huge water fight.
Super fun and you don't have to pick up latex pieces of balloon afterwards.

Be sure to wear gloves when using the vinegar or it will stain your hands.


Use the sponge to wipe on the vinegar mixture.
It will look a little light at first but darkens as it drys.


After the vinegar dries completely, I gathered my paint colors.
I had 4 slats and 3 paint colors so I mixed two to make the color for the other slat.


They got a light dry brush layer of paint.
Let dry and sand slightly to age a bit.


After the Ombre paint dried, I screwed the back slat to the wood to hold them together.
These aren't the same pieces but the process is exactly the same.


I got out my stencils from the last batch of pallet wood projects.
Press the contact paper in place and brush the paint on.


Let the paint dry completely before removing the stencil.
It will give you cleaner lines.
Sand again slightly and apply a finish coat.
I usually use a wax paste top coat, but a quick spray of polyurethane would also do the trick.


Add hanging hardware if desired and you're done!


I thought it would be fun to put the sign on my vintage suitcase in my living room for the photo op.


Ombre Pallet wood birds.
Simple and sweet.

Happy Crafting!


Friday, October 4, 2013

Birds on a Branch


Another batch of wall art gets delivered to Twigs and Twine today.
I must say I am so loving this creative process.
The sad part is my house gets woe-fully neglected when I'm working on projects.
So let's get this post done quick so I can save my home.

Someone asked about my process using the projector.
It's similar to the way I made this project, and this project.
These pics aren't great and I'm certainly not a professional,
but I set it up this way so I can watch/listen to something while I work.
This time it was Safe Haven by Nicholas Sparks.
I have a secret crush on Josh Duhamel.  Sshhh... don't tell.
I recently read the book and of course the movie was a must see.

So back to business.
I put my projector on a chair, then put my board on one of my pub table chairs.
It's just the right height for the image from the projector.
Then I get another regular chair and sit next to the board.


This one is looking from behind the projector to the pallet wood board.


Plain and simple.
Projector on chair.

It does take me a little bit to get everything all lined up,
straight, and evenly spaced.
Especially since moving the transparency is exactly opposite to what it
does on the board.  
I forget that part every time.

Sometimes I have to change the distance between the projector
and the board I'm working on to get the right size of image.


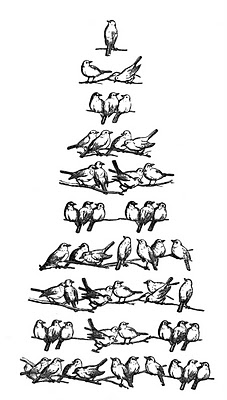
Of course the image came from The Graphics Fairy.


I printed it out at a high resolution, then took the copy to Staples.
It's about $1.00 to get it printed on a transparency.
I've definitely got my money's worth out of that $1 transparency.

Now I get my Sharpies and start tracing.
I usually use the regular tip to trace the outline,
then the broad tip to fill in the spaces.

The nice thing about sharpies is that there is no drying time like with paint 
and it is much easier to control than a paintbrush.  
I do like paint pens, but they are pricey.  
So for now I'll just stick with Sharpies.

I give the image a light sanding to age it a bit.
Then a wax paste coating.
Some easy and cheap hanging wire and I'm done!


Birds on a Branch.

Simple.
Beautiful.


Tuesday, September 3, 2013

A Bit More Wall Art


I'm super excited about my stuff in a new space.  
It's all over at Twigs and Twine in Zinnia's in Phoenix.
Here's a pic of the things I did last time.
You can see her Facebook page here.

I wanted to try some new techniques for the next batch of signs 
so I tried the steel wool/apple cider vinegar method.  
It turned out so easy and super cheap to do.  

I definitely will be doing more.

I've wanted to try this method for almost a year 
but I couldn't ever find plain old steel wool anywhere.  
It always had the soap in it.  

aka.  SOS pads.  

I knew I didn't need the soap so I bided my time and kept looking. 
Finally by a crazy random happenstance, 
I was walking through the paint section of Walmart and struck gold...  

Well, steel anyway.  

It's super cheap and doesn't have any soap in it.  
There were two grit sizes.  
I got the one with the smaller grit size.  
Now to dash home and try it out.  
Since I knew it would be a chemical reaction, 
it had to go into a glass bowl.  
Metal would never do, 
and I'm afraid it would ruin anything plastic so I stuck with a glass pyrex bowl.
I just poured some apple cider vinegar into the bowl 
and set one steel wool pad in the vinegar.  
I made sure the vinegar covered the steel wool.  

Then wait.


24 hours later.


Since life got crazy all of a sudden, the steel wool sat for at least 24 hours.  
I think the longer you leave it in the vinegar, 
the darker the result of the 'stain'.  
So it's up to you how dark you want to go.

I cut and screwed my pallet boards together.
Gave them a good sanding, and grabbed my gloves.


Be sure to wear gloves and work in a well ventilated area.  
I was in the garage with a fan blowing, but outside would work too.
Just dip the steel wool pad in the vinegar and smear it on the wood.  
It goes on like stain, but you don't need to wipe any excess off.  
It seeps into the wood on it's own.
You can see the huge difference as I'm wiping the vinegar on the wood.

Let dry completely.


Next I got out my trusty Con-Tact paper and my sister's Cricut.
{J} over at Twigs and Twine wants clean lines, 
so I made some stencils with the Con-Tact paper.

This time it's LOVE.


Put the contact paper on the mat paper side down and cut at a low depth.


Next I laid the negative contact paper on the wood and pressed firmly.


Sponge on a little paint, remove the stencil and you're done.
I was able to do 3 boards with one Con-Tact paper stencil 
before the sticky-ness wore off.
It was a little tricky to place the stencil, 
but just work from one side to the other 
smoothing out the Con-Tact paper as you go.


Super easy.
Clean Lines.

I gave it a light sanding to weather it a bit, then a wax coat to finish it off.
Some hanging hardware and it's done!


I love it when a pinterest idea really works.

I've got some holiday ideas floating around in my head so hopefully you will see some soon!
Be sure to come back often!

Happy Crafting!


Tuesday, July 24, 2012

Birdcages & 150!

I can't believe I reached 150 posts.  This is from my very first one.  It's from a Digi Scrapbook class I took from Jessica Sprague.  While my posts have changed a little since June 4, 2009, along with everything else in my life, I think I love blogging more than ever.

  Plus as a bonus, I get to share one of my all time favorite projects, and it only cost me about $5.


 My mom teaches school and I was lucky enough to get to borrow her opaque projector.  After this project, I think I need one of my own.  She said their school is giving the teachers new projectors that work with their smart boards, so I'm crossing my fingers I get to keep this one.

These are the images I got from The Graphics Fairy.  Just love her site.  I merged the regular birdcage and the lantern together in Photoshop to get the image I wanted.  Then printed it out and took it to Staples.  They made this transparency for $0.99.

I will be doing the candlestick soon and I will definitely share how. 

I just set up the projector, got some paint pens for $2 from Wal-mart and went to town.  It took about 2 pens to do the whole image.  It's in a space that's kind-of dead space behind the door.  Origionally I was going to put a mirror there, but I was afraid it would be broken when someone opened the door.  

This is perfect.  
I see it every morning when I wake up.  
Just gorgeous!

Here are some close-ups of the lantern/birdcage.
I love how it turned out!


 Here's a teaser of what we did in the boys room with the projector.  I'm waiting for the vinyl from my sweet sis-in-law and I'll post final pics.  It's amazing how the projector has opened up so many possibilities for projects.  Maybe thats why it's called a PROJECT-OR!


Print It Button