Thursday, September 29, 2011

Hawaiian Delight

For some reason I've been in the mood for Hawaiian stuff.  Call me crazy.  It's OK.  I don't mind.  Anyway here's what I made.  First, 

Slow Cooker Coconut Sweet Potatoes
 1/3 cup brown sugar
(I made this with white sugar and 1 Tbsp molasses. Mix well to get this)
Peel and dice 2 lbs of Sweet Potatoes.  Place in crock pot.


 Cover with brown sugar, 1/4 cup butter melted, 1/4 cup coconut, and 1/4 tsp cinnamon

Cook on low for 6-8 hours or high for 3-4.
When finished stir in 1/4 tsp vanilla and 1/4 tsp coconut extract.

Toast 1/2 cup coconut in oven to sprinkle on top.

Second,

Hawaiian Delight
Heat your pressure cooker on the stovetop with 2 Tbsp olive oil.
Brown 6-8 chicken tenders
Add 1 cup white basmati rice
1 1/2 cups chicken broth
Cover and bring to pressure.  Pressure at second ring for 5 minutes.  Drop pressure with cold water around rim of pot.

Add 3/4 cups sour cream
2 stalks celery chopped
1/2 bell pepper diced
1 bunch green onions chopped
2 cups canned pineapple chunks drained

Stir to mix and serve over bed of chow mein noodles, topped with toasted coconut.
A little Island Fare in the middle of the desert!

Wednesday, September 28, 2011

Molasses Oatmeal Bread

This recipe is seriously one of my favorites! I got it from my good friend Erica who is an amazing baker.  It is also a very versatile recipe.  You can make it as whole grain-y as you want.  I've done it multiple ways and it always turns out super yummy!  Here goes:

Layer the following ingredients in your mixer. 

(I use a Bosch, if you're using a Kitchen-aid you will need to 1/2 the recipe.)

5 cups hot tap water
4 cups quick oats
2 Tbsp salt
1 cup sugar or honey
2/3 cup oil or applesauce (they can be used interchangably)
2 eggs
1/3 cup molasses
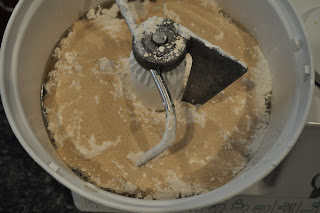
It will look like this:
 Next layer about 3 cups flour over the ingredients trying to cover the liquid. Then sprinkle over the top:  3 Tbsp yeast
 Turn the mixer on and mix for about 30-40 seconds to combine the ingredients.  Turn mixer off, cover and let sit for about 1-2 minutes. This lets the yeast develop.

Now turn on mixer and begin adding flour one cup at a time until it cleans the sides of the bowl.
See Clean Sides!

 (The flour can be white, wheat, or a combination of both.  If using more wheat than white, you'll need to add 2-4 Tbsp vital gluten to the dough)

Cover loosely and let rise.  If using more wheat flour you don't need to let it rise twice.  Go straight to the next step.

 Once the dough is peeking over the bowl, remove lid and turn out on to floured surface.
 Divide dough into 4 balls.  (For Kitchen-aids, 2 balls.)
 Knead into loaves and place in pans sprayed well with Pam or cooking spray.  Cover with plastic wrap and let rise until dough is above the rim of the pan.

Preheat oven to 400 degrees.
When oven is ready, place loaves in oven and drop temperature to 325 degrees.
Bake for 32-33 minutes.

 When bread is done, remove and brush tops with shortening.  I use this little brush I got from King Arthur Flour here. Sweet!

Let cool slightly, slice and enjoy your
little piece of Heaven!

Monday, September 26, 2011

Mason jar Decor

While working on this project I couldn't help thinking about Gaston in Beauty and the Beast.  You remember the line from his song... "I use Antlers in all of my decorating!"  

Well... I use Mason Jars.

Get 2 similar jars.  I used two wide mouth pint jars. And find some cording.  I may make holders out of wire someday but I like the rustic-ness of the twine.

 Wrap the twine twice around the top of the jar and secure with a bread bag thingy.
 Remove from jar and lay on table.
 Cut 2 lengths of twine for the handle. I doubled mine.
Tie one side to loop.

Then tie the other.


Place the twine on the jar and tighten and tie the twine around the jar.
Now you're ready to hang them.

Mount your hooks to the wall.
Mine came from Rod Works.
I recently discovered them and have fallen in love.  Luckily for me they opened a new store about 5 minutes from my house.  I know there will be multiple trips in the forseeable future.

I still need to think about what to put in them.  Maybe I need to go back to Rod Works for some ideas.  But even with a few black rocks in them, I love it!


Halloween Graphics

I'm so proud of myself.  I finally got a Halloween thing done before October 30th.  It's even still September.  This is in my kitchen.  Still no curtains.  That will come.  But for now I want to do holiday graphic each season.  The jars at the top is for another post.


 Gather your materials.  I used Bazzil cardstock and some frames I had from IKEA.

Trim your cardstock to fit your printer.   Print out images and trim to fit the frames.
 My little boy loved the tarantula.  He has one to match!
I use these gorilla hooks.  I can put them anywhere and they are super easy to use.

Right Side

 Left Side

 I didn't even think about arrainging them to face the window.  Luckily it turned out that way.

These came from Graphics Fairy.  I love her site.  So many great ideas and it's all free.
 I resized them and added the frames in Photoshop.  Feel free to download them.  They are formatted to fit a 8.5x11in sheet of paper.
 I think I may use these animal prints in my boys room when Halloween is over.


 My oldest has a real snake.  This would be perfect in his room.
Happy Halloween!

Tuesday, September 20, 2011

New Vintage Beadboard Signs


New State.


New House.

New Life.

I'm sooo ready to craft again. You wouldn't believe how much time I lay in bed and think of crafting ideas. My husband says I'm an addict.

Yes. Yes I am.

I found these beadboard signs out in blog land and had to try my hand at them.

Super easy and cheap and customizable. (is that a word?)

Anyway here goes:

Supplies:


Cricut
Beadboard wainscot boards 6 per pack $11.00-ish
Can Spray paint in favorite color
$3.50-ish
Clear Contact Paper (the big roll)
$6.00-ish

The picture has stain in it, but when I used it on one of the boards, it totally ruined it. I'll have to repaint that one.
Don't use stain! A poly finish, fine, just no stain!

The wainscoat is great because it's precut for you. You can buy the big 4x8 sheet of beadboard and have your store cut it for you, but I didn't have time to wait. 4 year old in the cart. (need I say more)

Cut your contact paper to fit your cricut sheets and adhere. I cut letters with Stone Script, Billionaire, and Alphalicious. Use the lowest blade depth setting.

Remove the contact letters and place on your beadboard. This was a little tricky to get the spacing right, but luckly contact paper is easily repositionable and cheap if you mess up.

Next I took the boards outside to the back yard and laid down some plastic bed covers we had left over from moving.

Spray each board with spray paint with even strokes and don't forget the edges.
Let dry completely. (Thanks to the Arizona sun this didn't take too long)

Solar Power Rocks!

Carefully peel off the contact letters and discard. There may be some bleeding but it's OK.
Perfectly Imperfect is my mantra.

Sand the edges and face of the boards with a course grit sand paper and you're done! (You could add a clear coat of Polyurethane to protect the boards but I didn't have any on hand. I may do it later.)

Place in your home and enjoy!
It's so good to be crafting again.


Almost makes you want to go in and do some laundry...almost.


Print It Button