Tuesday, August 13, 2013

Christmas Wishes - in August


I know it's August.
The kids just started school yesterday.
But it's time to start thinking about Christmas.
Especially if there is some long, involved gift you want to give.
I scoured pinterest and some of my pics for some of my favorites.
Here's the top 10, in random order, of what I'm thinking of doing:


1. Christmas Tree Decor:  A super cute and easy Christmas board.
I think I will make mine out of pallet wood similar to the one by Becky over at Beyond the Picket Fence.


Source: Beyond the Picket Fence

Here's another version I love!
Love this
Source:  Whatever


2. Door Joy Sign:   I'm so loving this front door sign.
Unfortunately the originator page no longer exists.
I will just have to make it up myself.
Shucks!
.
3. Paper Dolls:  My girl would love this paper doll set.
Although I think I would laminate and magnitize each piece.
Unfortunately the original blog no longer exists.
What's up with that?  Anyway the idea is super cute!

Paper doll sets. Great gift!
4.  Fabric TeePee:  This teepee would be super easy to make with some $1 sheets from Goodwill.  I definitely see this one in my future!

3 twin sheets & hula-hoop & rope - great backyard or camping play area.
Source: Pinterest

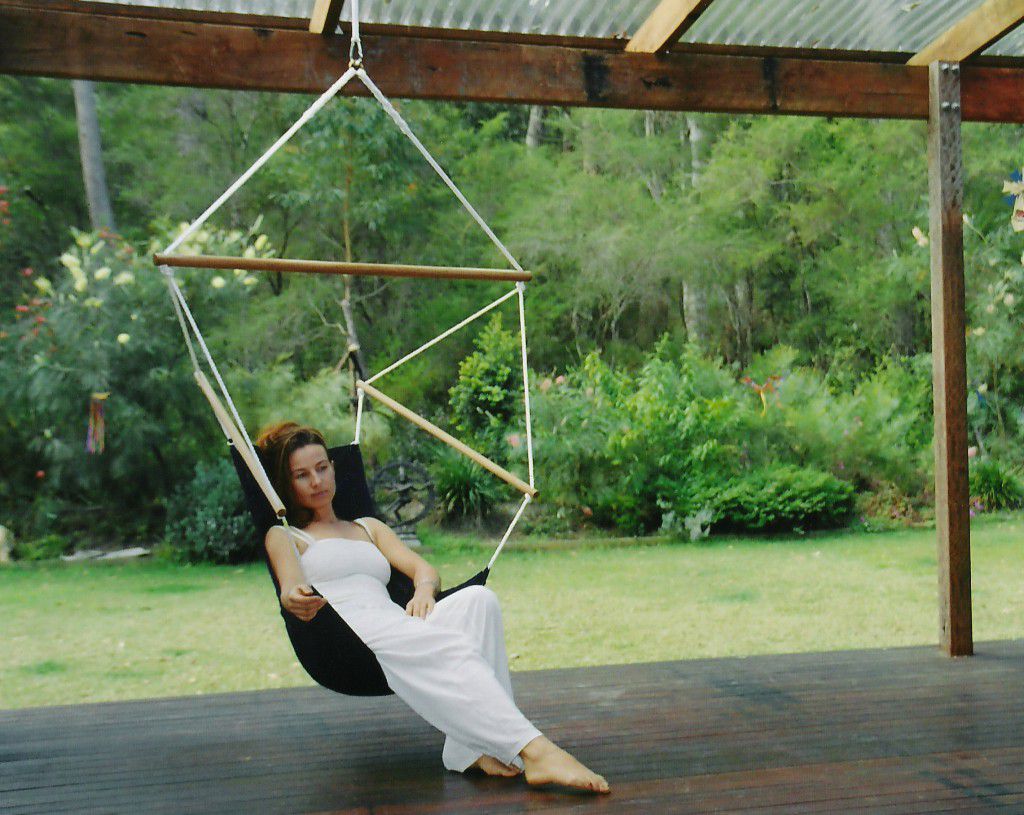
5. Swings:   If I had kids this small again, this would definitely be on my list.  I may just have to make some for my nieces.
The Adult ones are also awesome!


Source: Swingz and Thingz

6. Denim Car Tracks:  If you have little boys, this would be a super easy project with all those old jeans, maybe even head over to Goodwill's $1 days and get some cheap old jeans to cut up.

Source: Lil Mop Top

7.  Family Fun Wooden Lawn Games:  This is a fun family game that would be easy to make as long as you have access to a miter saw.
Of course Martha had to be part of the roundup!

mollky-game-mslb7128.jpg

Source: Martha Stewart

Here's two more wooden family games that would be fun to make:  Giant Jenga

how to: giant wooden block stacking game tower. a.k.a. Giant Jenga to play outsideSource:  Instructables


And Lawn Scrabble


Source:  Constantlylovestruck

8.  Tree House:  This fun tree house would take a bit more carpentry skills than I have but it would be super fun for boys or girls. They have several different kinds to choose from.  I'm really liking the garden gnome theme they have going here.  Super cute!  I would like mine to come apart for easy storing.  Hmm... I may have to ponder that one a bit, or just buy one from them.

icon
Source:  Squidoo

9. Fabric Lego Bag/Play Mat:   I love this Lego bag but I would make a few changes.  This is a definite project in my future.  I have lots of Lego lovers in my house and this would be a perfect gift.


Source:  Freshly Pieced

10.  Family Puzzle:  I saw this last one and loved the idea but I would totally change it.  I would mod podge family photos on each piece instead of scrapbook paper.  Either one giant group photo cut up or individual photos of each family member.  This is another definite project on my horizon.


Source:  Ooops, I craft my pants

What will you make for Christmas this year?
It's time to get your craft on and start planning, hunting, and creating.

As of this minute there are only 133 days, 15 hours, and 26 minutes until Christmas.
Thank you xmasclock!


Monday, August 12, 2013

A Pretty for Me Time


Hip Hip Hooray!

All my babies are finally back to school. 
It was a little crazy there at the end because the start date had to be pushed back a few days.  
It really threw us all for a loop getting all geared up for school to start and the find out we had another week of summer vacation.  
I'm not complaining too much, we did get to do some fun things together before the grind started back up. 

I've just been missing 'ME' time.  

Since all my kids are in school full time now, it means several hours of whatever I want.  
Usually that means crafting, cooking, and a little exercise.  
Not necessarily in that order.  
I do have plans to refocus my goals personally and physically.  
But more on that later.

I've been dying to create something beautiful just for me.  
It turned out that I forgot about my friend's daughter's sweet 16.  
So this bracelet ended up as a gift to her.  
She leads the singing in church and she wore this bracelet.  
It was fun to see her lead with my pretty charm bracelet on her wrist.

But enough gushing.  
Let's get down to business.

You will only need a few supplies for this bracelet.

I used a sheer ribbon, but really a satin one would work just as well.  
Pick your favorite color...  match a favorite outfit.  
The sky is the limit!  
I also used some head pins, beads, a few charms, 
jump rings, some clamp ribbon ends, and a toggle clasp.  


First create the bead charms with the head pins and the beads.  They are easy to make.  Just slide the bead on the head pin and coil the remaining wire into a loop like shown.


Now decide where you want your charms and thread them on the ribbon.  I tied a knot in the ribbon for each charm to keep them in place and eliminate them all sliding to one side.

Measure your wrist and decide how long you want the ribbon to be.
Add the Ribbon clamp ends.


Finally add your jump rings and toggle clasp.  Super quick and done!


I'm so happy to have some 'Me' time again.
What will you create in your 'Me' time?
I'd love to hear about it!

Wednesday, July 31, 2013

Where have you been?


I have obviously been on a blogging hiatus for the last month.
Sorry about that, but it's been for a very good reason.

Summer Vacation!

This year we took a 3 week road trip and traveled over 4000 miles 
from Phoenix, Arizona to Victoria, British Columbia, Canada, and back.  
We saw some of the most beautiful country 
I've ever seen.  
There were places where you could swear we were in Hawaii, 
then the Rainforests along the equator, Parliment in the United Kingdom, 
and some of the most beautiful beaches I've ever seen.  

Almost a world tour.  

The water was freezing cold for sure.  
The water temperature never got above 55 degrees F.  
But since my kids are related to their Dad, 
they went swimming wherever they could and for as long as we would let them.  

Not me.  I'm a super baby when it comes to cold water.
But let me share a little of our vacation with you.

We were going to stop at Lake Tahoe, NV but didn't quite make it.
We spent too much time at a Vegas Breakfast Buffet on the way up.
That trip will have to happen later.
We did get kicked off a military base somewhere near Area 51.
Yes that place really does exist.  I've seen it.
My uncle was pulling a 30 trailer and a piece came off.  We stopped to
fix it and let the kids play on what looked like an old abandoned lookout tower
while the Dad's fixed the part.
What we didn't realize until we got in trouble was that it was a highly secret
military base and they didn't want us taking any pictures and to leave immediately.
Kinda scary, but oh so cool!!

After Nevada we stopped at Crater Lake.
If you haven't been, definitely add it to your bucket list.
I didn't even know it existed until I flew to Portland, Oregon and
the pilot tipped the plane as we few over so we could see it. 
Then and there I decided we had to go.
Crater Lake is an imploded volcano that is only filled with rain and snow.
It's also the deepest lake in the USA.  
The water is so clear and so blue it's indescribable.


Next stop was Portland, Oregon.  There are a series of waterfalls along the
Columbia River.  This one was Horsetail Falls.  We hiked up and could play
behind the falls.  It looked very close to Hawaii.

We spent a few days in Seattle with family, then up to Vancouver, Canada.
From there we took the ferry over to Victoria, BC.


These are the Butchart Gardens in Victoria.
55 acres of breathtaking gardens.


This is the Parliment Building in Victoria.  
I really felt like we were some where in the UK
exploring some ancient architecture.


From Victoria, we headed south back to the US.
This sunset is on the Pacific Ocean at the Dungeness Spit.
The Spit is a 5 mile sand bar with a Lighthouse at the end.
It's a little known place that is one of my favorite places to be.


Crescent Lake, WA is another favorite place for me.
I love the blue of the water and the tree line that goes right up to the water's edge.
Simply breathtaking!


North Head Lighthouse.
There are actually 2 lighthouses on this penninsula of Cape Disappointment, WA.
This one was my favorite.
There's a soft spot in my heart for lighthouses,
and I feel drawn to see as many as I possibly can.
There will definitely be some projects comming soon with my lighthouses.


Cannon Beach, Oregon.
The beaches along the Oregon Coastline are some of the most beautiful beaches
I've ever seen.  I love the huge rocks that stick out randomly along the coast line.

Have you seen the old 80's movie The Goonies?
This is Goonie Beach.
It's actually called Haystack Rock.
We were lucky enough to time it right at low tide.
The base of Haystack Rock is a huge set of tide pools full of starfish,
sea anemone, rockfish, hermit crabs, etc...
It was so fun to play and explore the tide pools.


This was a new discovery for our family.
It's called Fern Canyon in the Redwood National Forest.
It's a tricky drive to get there and you have to ask for directions because
it's not on the usual maps, but definitely worth the drive.
The walls were probably 3-4 stories tall and completely lined with ferns.
Beautiful.


This was my favorite picture from the trip.
We happened to stop at just the right time to snap this beauty
in the Redwood Forest.

I think God spent some extra time crafting this area.
I believe it's some of His best work!

Where did you go for summer vacation?

Now what do I do with all the stuff we collected along the way?
Come back soon.  
I have some fun projects comming up to showcase your vacation treasures!


Thursday, June 27, 2013

1-2-3 Cake


Needing a little cake?
Only have about 2 minutes to make it?
Done and Done!

My mom-in-law taught me this quick and easy way to make cake.
It's perfect for summer because there's no need to turn on the oven and heat up the house.
Plus it's so easy the kids can make it for themselves anytime.
I know, who needs more cake right?
Well, sometimes I just need a little sweet something in my life and this cake fits perfectly.
I do want to do more experimenting with mix-ins 
and different kinds of cake mix but for now, 
this is a fun little cake that literally takes less than 2 minutes to make.
I'm serious!
It will probably take longer to read the post than to actually make the cake.

Ok.  Enough chatter.
Let's make some cake.

1-2-3 Cake

All you need is 1 box of Angel Food Cake mix and 1 box of another kind of cake mix.  
One has to be Angel Food, the other doesn't matter, just according to taste. 
Put in air-tight container and mix well.

3 Tbsp cake mix
2 Tbsp water
1 minute in the microwave.
Done.


Get out your mug.
Measure 3 Tbsp of cake mix into your mug.


Measure 2 Tbsp water into the mug.


 Mix well with a spoon.  It will begin to froth and foam a little.  That's Ok.


Put your mug in the microwave.  You can do two at a time, but if you do one at a time, they rise higher.


Microwave for 1 minute.


Shake the mug slightly to loosen the cake from the sides.
Dump out the cake on to a plate and let cool slightly.  
Be carefull.  
It will be hot when it first comes out.


At this point you could add frosting, but it might get a little messy.
That part is totally up to you!
I'm not the one cleaning up after your kids if they make a mess. ;)


Almost instant cake.
Yummy and Perfect for Summer!

As Marie Antoinette would say...
"Let them eat Cake!"


Sprouted Ezekiel 4:9 Bread

 I first came across this bread idea at my local food storage place called FoodWise.
It was a legume and grain mix you could buy to make your own bread from.

I was instantly intrigued.

Some of the recent classes at Shars incorporated bean flour into your bread.  It's a great way to use those super old pinto beans that won't get soft no matter how long you soak them or cook them.  Just grind them up into flour and use it as a great protein addition to whatever you're making.  Bean flour is also a great thickener for soups and gravys too.

I will definitely be doing more of that later.
But let's start at the very beginning.

The Bible.

I scoured Ezekiel and for some reason couldn't find the reference, so back to Google and found it instantly.  Ezekiel 4:9.

 9 ¶Take thou also unto thee wheat, and barley, and beans, and lentiles, and millet, and afitches, and put them in one vessel, and make thee bread thereof, ...

My Footnote says that Fitches is another name for Spelt which is an ancient grain.

So next I needed to find a recipe.  First I found a source to buy the sprouted bread already made, but I didn't want that.

Then I found this recipe over at allrecipes.com. Honestly it didn't look that appetizing. 
I used the measurements for the different kinds of grain and lentils, tweaked it just a bit and made it my own.  Then took it to the next level and sprouted everything.

The result:  A super power packed bread that is tasty, hearty, and beautiful.

Let's get started.

Sprouted Ezekiel 4:9 Bread

I sprouted the lentils and beans separately from the grains because they need to be ground separately in the grain grinder and there's no way I'm sorting them after the fact.

In one large bowl combine:

2 1/2 cups hard red wheat
2 1/2 cups hard white wheat
2 cups spelt
1 cup barley
1 cup millet

Mix together and cover with water.

In another bowl combine:

1/2 cup dry green lentils
4 Tbsp dry Northern Beans
4 Tbsp dry Kidney beans
4 Tbsp dry pinto beans

Again mix together and cover with water.


Let both sit overnight.  
The grains and legumes will swell.  
Drain and place in a collander in another bowl.  
Run under water then cover with wet paper towels or a wet dishcloth for another 12 hours.  
Run under water as many times as you remember to do it.  Probably about 3-4 times during the day.  
We want to keep them moist, but not soaked.

By now the sprouting should have started on everything.  
If you look close you can see the little tails emerging from the grains and the legumes.
Drain completely.


Now place the grains and lentils on a drying rack
in your dehydrator or on cookie sheets to set out in the sun.
Let dry for about 6-8 hours or until completely dry.
They must be completely dry before you grind them into flour or you will ruin your grain grinder.

Grind the grains first on a flour setting.
Next, turn the setting to very coarse or as large as your grain grinder will go.
Pour the legumes in.  Don't worry about the size.
You can see the little flakes of the legumes in the flour.
But you won't see them again in the bread.


Now let's bake.

In a Bosch mixer combine the following:
(note: if you are using a Kitchen Aid you must 1/2 the recipe)

6 cups warm water
2/3 cups applesauce
2/3 cup honey
3 Tbsp dough enhancer
3 Tbsp vital gluten
3-4 cups fresh ground whole grain and legume flour
3 Tbsp instant yeast

Mix on low until just combined.  Let sponge for about 10 minutes.

With mixer on, start adding fresh ground flour until dough starts to take shape.
Add 2 cups of unbleached white high gluten flour.

Add more flour as needed for dough to clean the sides of the bowl.
Set mixer to medium and let knead for 6 minutes.

After 6 minutes add 2 Tbsp sea salt. Add more white flour if necessary to keep the dough from being sticky.
Knead for another 2-3 minutes.

Meanwhile prepare loaf pans by spraying with cooking spray.
This batch will make 4-5 loaves depending on the size of your pans.
I use super long ones from IKEA.  Love 'em!

Oil hands and counter. Turn dough out and divide into 4 balls of dough.
Knead into loaf shape and place in pan.
Cover with plastic wrap and let rise until about 1 inch above the rim of the pan.

Preheat oven to 400 degrees F.
When oven is done preheating, remove plastic wrap and place pans in oven.
Drop temperature to 325 degrees F.
Bake for 33 minutes.

Remove and place on cooling racks.  Brush tops with shortening if desired.


Let cool, slice, and enjoy!


Mmmm... Want a piece?

Print It Button