
I got the idea to make a holiday advent calendar from my local quilting shop. Their's was for Christmas, but I thought, why not make one for Halloween? So here's my Tutorial for an advent calendar.

Here are the templates I made for the main body of the calendar. They are made to fit an 8.5x11 size page, so you can Save As the template and then print it out on your printer.


Choose fabric for each of the pieces. I just got some Fat Quarters from my fabric shop because you don't need very much of each color. I also got some fabric adhesive called Pellon.

I used the Pellon to adhere the fabric to the background fabric. I'm not sure I would use it again. It was kind of honery and didn't want to stay stuck. Next time I'll probably just pin the pieces in place, then stitch them down.
Next I have some cute number stamps from Technique Tuesday. I love their stamps!
Lay down some plastic. I used a garbage bag. You definitely don't want paint all over the table. Get some regular acrylic paint, and start stamping all the days of October on your fabric.


After you have printed out your templates, trace them on the pellon, or just cut them out and then pin them to your fabric to cut out the shapes. Since I used the pellon, the pictures show what I did.
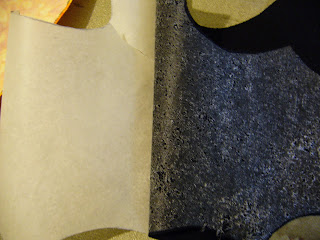
Follow the manufaturers instructins and iron the pellon to the fabric.


Peel the paper backing off, once you have trimmed the shapes down. Then lay them on your background fabric to see where you want to lay them.

Here's what mine looked like.
Next I used some heavy black embrodery thread and hand stitched the shapes in place. The Pumpkin was a little difficult with all the layers of pellon, but it turned out OK.
Turn on a movie with your kids and sew!

 I use a two different kinds of stitches on my project, vertical and horizontal. You could use a blanket stitch too, or use your sewing machine. It's up to you.
For the Happy Halloween, I used a pencil to hand write the words, then stitched over the lines.

After you are done stitching the pieces in place, add a border around the background fabric, then add your pockets.


I pre-ironed the pockets to make it easier to sew them down. If you use Felt, you don't have to tuck the edges under. Next add another border if you wish, and the backing. I added batting to mine, but it ended up being kind of bulky, so I don't think I'll do that again. Edge stitch the sides and quilt in the middle if you want. Be sure to firmly pin everything in place so it doesn't shift while machine quilting it down.


That's it! Fill the pocket with treasures, candy, or love notes! Happy Haunting!
No comments:
Post a Comment