Monday, May 21, 2012

A Few Pretties

I needed to make some things to donate to our Annual Scout Silent Auction Fundraiser.  I decided to play around with my jewelery supplies and see what I came up with.  Here are 3 simple projects I made.
 Buttons and Black cording.  The cording should be about 4 times the finished length because you are doubling it.  Tie a loop in one end, making sure the hole is just barely large enough to fit your closure button.
 Thread one side of the cording through the button if there are 2 holes, both threads if there are 4 holes.  Tie a knot after each button.


Whe you get to the end, thread both holes and tie a square knot on the underside of the last button as shown.  And you're done!


 Feel free to play around with some fun buttons to match your outfit.  You can whip these little babys out in a few minutes.

 Next is a pearl bracelet.  Using strong beading filament, make a small loop for the end and close with a crimp ring.
 Thread the beads.  I alternated large and small beads.
 When you get to the end, finish off in the same way as you started.
 Thread a large piece of satin ribbon through the loops and use this to tie the ends closed.
 Simple and elegant!

Lastly is a floating bead neckace.  I'm so loving these right now and they are super easy to make.

Take a piece of beading filament 2 times as long as the finished piece as you are doubling the filament to create the floating beads.  I also coiled some of my fine wire to creat the two little springy things.  They cover the end crimp ring.  Using a crimp ring, secure the filament to the toggle you are using and thread the coil over both strands of filament.
 Alternatning strands of filament, string the beads, sometimes putting the bead on both strands, sometimes on only one strand.
 Finish off the end toggle with 2 crimp rings, one for each strand, making sure to thread the other coil on first to cover up the crimp rings.
Easy and quick!  I love pretty things, especially when I make them myself!

Friday, May 4, 2012

Cinco De Mayo

I'm a Southwest Native. Consequently I love Mexican Food.  Cinco De Mayo is pretty big around here, mostly for others it's an excuse to drink, but since I don't drink, it's a time to get together and have some amazing Mexican Food. 
You know I'm making some of these.  My favorite! 

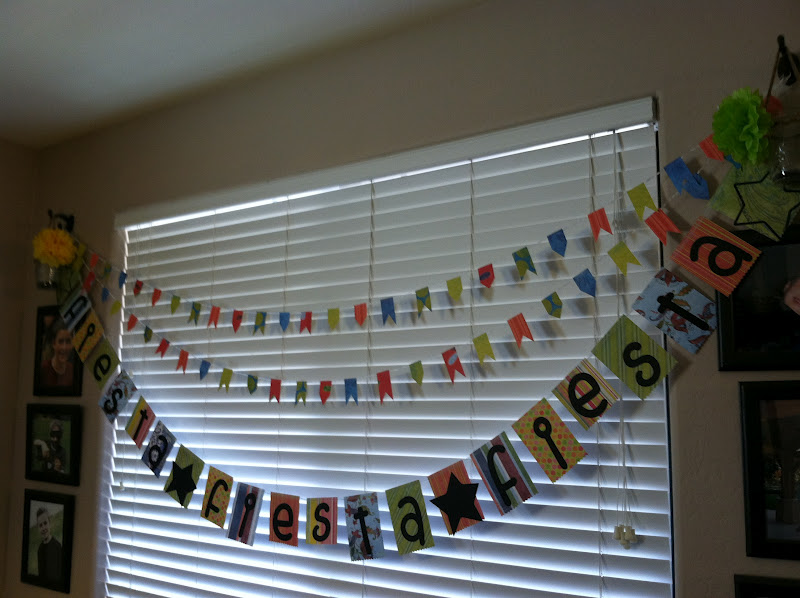
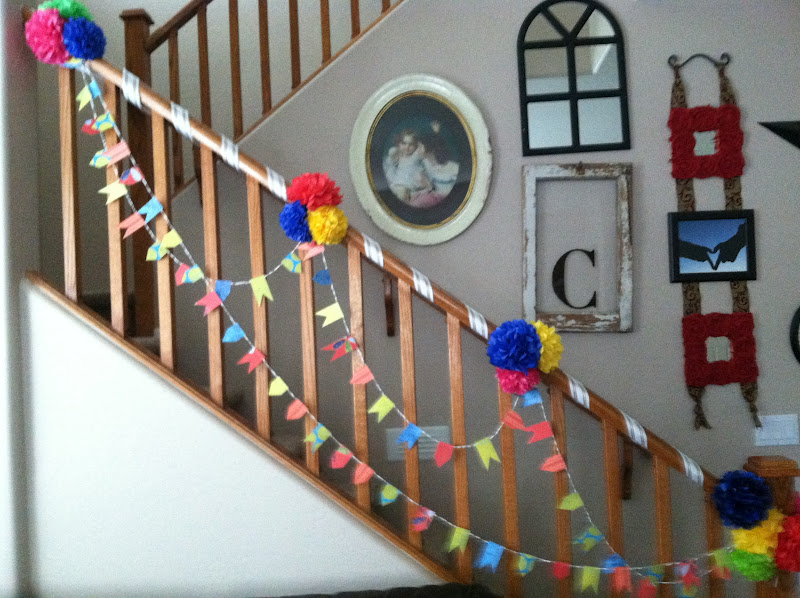
I also love to make some fun decorations to celebrate.  This year I only spent about $3.50.  $2 for tissue paper at the dollar store, and $1.50 for ribbon from Walmart.  I haven't finished my table-scape yet, I'll share when it's done, but the wall deco is done.  Not to bad if I do say so myself.  

The bunting was just little pieces of scrapbook paper cut as shown and sewn onto tiny ribbon.

 I made about a eleventy-billion tissue paper flowers with the help of my friend {C}. Some smaller, some bigger, some fuller, some less full.  I like the variety.
 For some reason the lighting in my kitchen is kinda bad. Sorry about that.  The Banner just says "Fiesta" about 3 times.  I used my Cricut to cut the letters.


 This is the stairway. It's wrapped in ribbon, bunting and tissue paper flowers.


 Remember the wreath I made here? Well I'm in a new house without a fireplace so this it how I chose to display it.
 It was fun adding the bunting and flowers to it.  I love how it turned out.

 Lastly the wreath on the front door.  Super easy and I think pretty cute!


Happy Cinco De Mayo!
Let's eat!

Tuesday, May 1, 2012

Beadboards and Monograms

 I started this project back when I did the bookshelf, but never got it finished.  I'm so happy it's done.  I love having this up in my bedroom.

 Here's another view.


Now for the how to:  I printed out large letters in the font that I wanted. You could also just purchase pre-cut letters from Joanns, or Hobby Lobby, or Michaels.

Then cut them out and traced them on some particle board that I had.
After cutting the letters out on the scroll saw, I put them on cardboard on top of push pins.  This keeps them off the surface for easy staining and drying. I used ebony wood finish and applied 2 coats.
 While those letters were drying, I used the same stain on the beadboard.  I really like the aged gray color I got with the stain on the beadboard.

 It got a light sanding to reveal a little of the white.
 Next I used some Liquid nails to glue the pieces together. The beadboard was put together along the grooves, then the letters glued on top. It took me a while to decide the exact orientation I wanted with the letters.

 Here's them laid out.  I made the ampersand bigger on purpose.


After everything was glued down, I covered it with a layer of plastic to protect the wood, then something heavy to keep things glued down tight and let it dry overnight. 

Attach your hanging hardware and done!


 I added some black burlap rosettes to the mirrors from Ikea as accents to the beadboard sign.


I am in the process of changing my bedding.  I will share as the pieces come together.

 I'm so excited!  It's going to be gorgeous!


Print It Button