
I'm sorry I have let life get in the way. Well that and my 2 year old took my camera swimming in a pitcher of Kool-Aid. It would have been fine, had it been my waterproof camera. But it wasn't. So here's a digi tutorial.
So here goes with another installment of the Tuesday Tutorial.
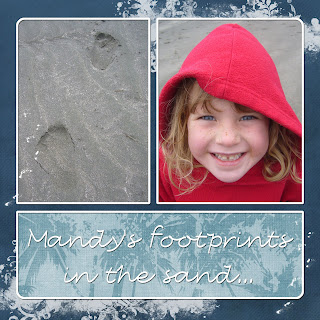
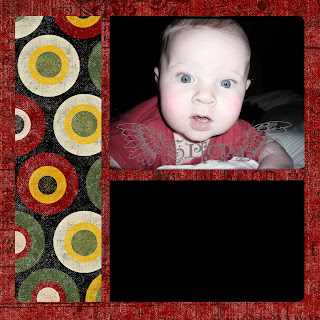
I played with making my own rounded corner template. Here's the pages I made:

Now let me show you how I did it. Templates are Awesome!
First, open your Photoshop program and hit Control + N to open a new document. Size it to the size you want. Mine are 8x8.
Now select your rounded corner shape tool. It might be hidden under the tool that looks like water spilled on the floor. Right click on that to find the rounded corner square. Make sure the top color on your pallet is black. Click and drag a large square to nearly cover your page space. Then when you let go of the mouse it will fill with the black. It looks like this:
 Now in CS2 I have to rasturize that layer by right clicking on that layer in the layers pallet and selecting 'rasturize layer'. In Elements, you select 'simplify layer'. Now we are going to cut up that square. Select your Rectangular Marquee tool. Click and drag a long narrow rectangle across one part of your large square. Go to Edit>Cut to delete that selection. It will look like this:
Do that again going the other direction. It will look like this:
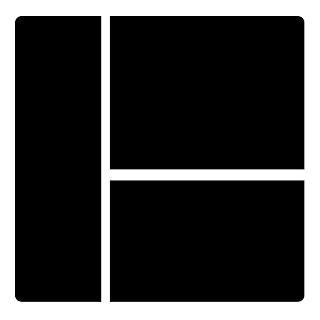
Or this:
 We need to separate these layers so we can clip different elements to them. Use your rectangular marquee tool again and select one of the shapes. Make sure the large shape is hightlighted in your layers pallet. Once one of the smaller shapes has the marching ants around it, hit Control + J to create a new layer with just that shape on it. It should show up in your layers pallet as just that one smaller shape. You won't see it on the main screen, but that's OK. Do the same thing to each of the smaller shapes.
Now drag the large cut up shape into the trash can. You don't need it anymore. Save this image as a .psd file labled template so you can come back to it again.
Let's add some pictures and pretty paper to this template. I chose the tinted vintage picture of my baby that we did a little while ago for the top rectangle. Drag your photo on to your main shape, making sure it is at the top of the layer's pallet over the smaller shape you want it to be in. Hover your mouse over the line between the photo and the shape and hit Alt + Click.
This will 'clip' your photo to that shape. It will look like this:
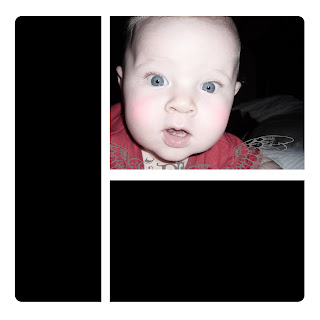
His photo doesn't exactly fit this frame, so I can use the Move tool to shift the photo around. It's cool how that works. You can also hit Control + T to get the Transform tool to resize your photo. I had to. Here's what it looks like resized:


Rather than adding brushes to my background, I used an overlay I got from http://www.scrapgirls.com/. This is what it looked like:

I like it but it's a little too overwhelming so I reduced the Opacity to about 50%.
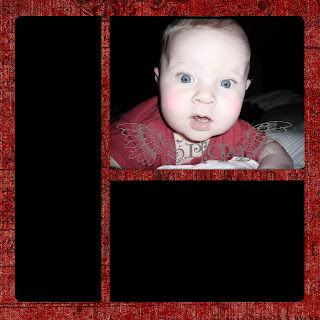
Now that's much better. Do the same clipping method to add your patterned paper to the other shapes. Mine looks like this:
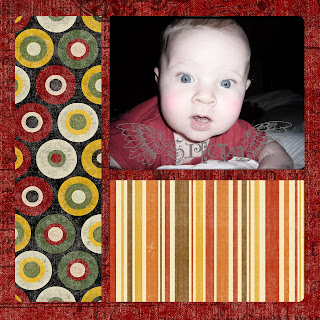
Since the circle paper was a little too big for my taste, I used the transform tool to resize the circles. Now let's add some drop shadows to your images. Click on one of the black shapes, not the paper, and then click on the little circle-f icon at the bottom of the layers pallet, or find where it says Layer Styles. This will open up your drop shadow options. I added a drop shadow, bevel and emboss, and a texture to that shape. It will automatically add it to the paper that is clipped to that shape. Once that is done, you can quickly add the same styles to the other shapes by:
2. Select 'Copy Layer Style'
3. Then hit Control while you click on each of the other black shapes in your layers pallet.
( this will select each layer all at the same time. If you hit shift + click on each layer it will select the entire column of layers which you don't want.)
4. Now right click again and select 'Paste Layer Style'.
Amazing! you just added all those layer styles to all those layers in one click! I love it when I can speed scrap!
Here's what mine looks like with the layer styles added:
 Now I want to add a text box to my layout. I did this by adding a digital piece of vellum to the striped block. Use your Rectangular Marquee tool and draw a rectangle inside your patterned paper block. Make sure your color is set to white. It will look like this:
 Now reduce the opacity to about 75%. I added a stroke outline to the outer edge of mine.
Here's how I did it: In your layers pallet, point your mouse on the thumnail picture of the layer with the white square on it. Hit Control + click to get the marching ants around the square.
Open a new layer that is above the white rectangle layer. Go to Edit>Stroke, I chose 15 pixels with the color as white, and the placement to Outside. Click OK and you have a white line that outlines your white vellum square.

Next add your text to the vellum square. I used 2peas scrapbook font for mine.

I think this needs just a little more to be finished so I added some digital stitching with a zig-zag brush I got from http://www.brusheezy.com/.
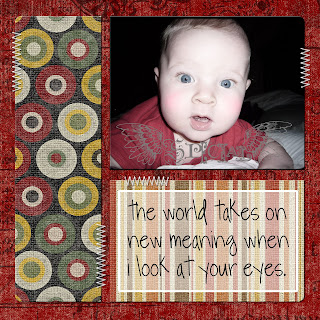
Here is the finished layout.
 Have fun with creating your own templates. It definitely makes scrapping quick and easy!
Remember to save your layout as at .jpeg to be printed or sent to an online publisher. They don't accept .psd files. I know, I've tried before.
Stay tuned for a super cute Halloween Advent Calendar that is almost finished. Your are going to love it!
I did it! I couldn't get the vellum thingie to work since I don't have the time to play with it, but I am so happy I got most of it to work. In Elements 7 I had to use the shapes tool and choose the rounded rectangle. It doesn't look exactly like yours, but it is similar-the rounded corners are not as rounded.
ReplyDelete